Get Started
The Appodeal SDK gives you access to 70+ Ad Demand Sources and makes them compete against each other in a real-time auction, maximizing your ad revenues. The Appodeal SDK also provides In-app Bidding, Automatic UA Optimization, User Segmentation & A/B Testing, Cross-Promotion and Direct Deals, Instant Payouts, and much more.
The following document shows how to integrate Appodeal in your Android project with your desired networks via gradle build setup, and configure all your ad formats.
- Android API level 24 (Android OS 7.0) or higher.
- Kotlin 2.2.0 or higher if your app is written in Kotlin. Java-only apps are not affected.
You can use our demo app as a reference project.
Demo App
Step 1. Import SDK
Here is a base and recommended build.gradle setup. You can add or remove any ad network or service adapter depending on your requirements.
We provide a convenient and interactive way to customize and generate build.gradle code based on selected ad types, networks and services.
To configure your build.gradle please visit Configure Mediated Networks page.
Generating code...
Once that's done, save the file and perform the Gradle sync.
Step 2. Connect Services
If you plan to run UA (User Acquisition) campaigns, want to analyze your metrics in Appodeal's business
intelligence tool without using an MMP, or want to use remote config for tests and settings, connect the services
below. The configuration from Step 1 does not include them. The code below adds the adapters of all these services:
add it to your app-level build.gradle. If you do not need some of the services, simply remove their lines, or
customise the set on the Configure Mediated Networks page. Each service also
needs its own setup, described on its page:
-
Connect Adjust or AppsFlyer to unlock Attribution features for your UA campaigns.
-
Connect Meta (formerly known as facebook-core) for User Acquisition.
-
Connect Firebase for Analytics + remote config for product A/B tests and settings.
Generating code...
Once that's done, save the file and perform the Gradle sync again.
Step 3. Set Up The Project
Network Security Configuration
Android 9.0 (API 28) blocks cleartext (non-HTTPS) traffic by default, which can prevent ads from serving correctly. Read more on this here.
To prevent the android system from blocking http traffic, follow these steps:
- Add the Network Security Configuration file to your AndroidManifest.xml :
<?xml version="1.0" encoding="utf-8"?>
<manifest>
    <application
        ...
        android:networkSecurityConfig="@xml/network_security_config">
    </application>
</manifest>
- In your network_security_config.xml file, add base-config that sets cleartextTrafficPermitted to true :
<?xml version="1.0" encoding="utf-8"?>
<network-security-config>
    <base-config cleartextTrafficPermitted="true">
        <trust-anchors>
            <certificates src="system" />
        </trust-anchors>
    </base-config>
</network-security-config>
Configure Admob Meta-data (Optional)
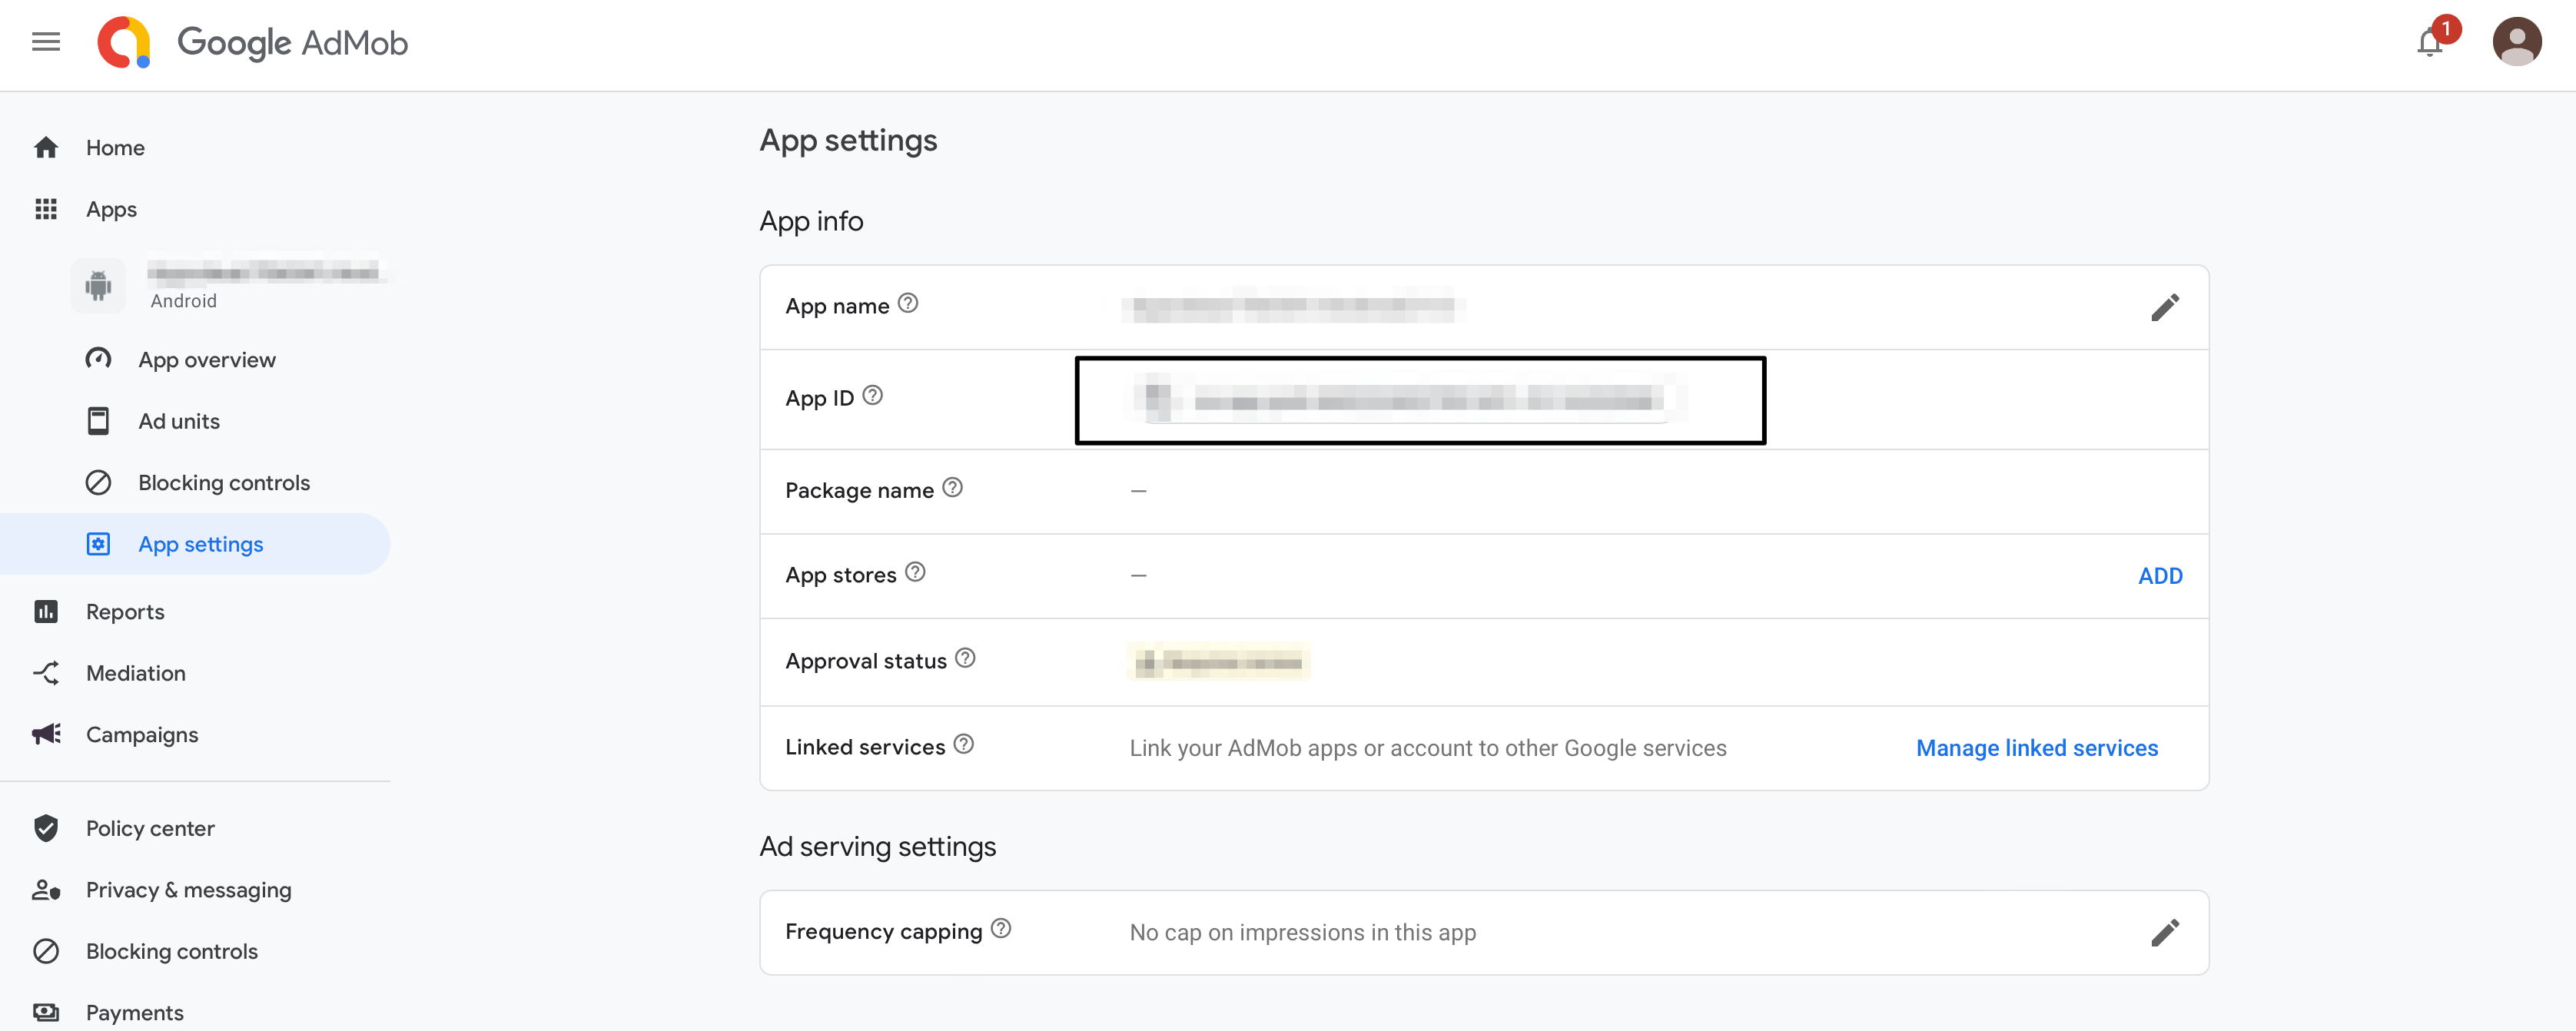
Add your AdMob app id to meta-data tag:
<manifest>
    <application>
        <!-- Add your AdMob App ID -->
        <meta-data
            android:name="com.google.android.gms.ads.APPLICATION_ID"
            android:value="ca-app-pub-xxxxxxxxxxxxxxxx~yyyyyyyyyy"/>
    </application>
</manifest>
You may find the AdMob app id in your personal account on the AdMob page:
Step 4. Initialize SDK
We recommended to call initialization method in your MainActivity - onCreate method only once in your whole app:
- Kotlin
- Java
override fun onCreate(savedInstanceState: Bundle?) {
    super.onCreate(savedInstanceState)
    /// Any other pre-initialization
    /// app specific logic

    Appodeal.initialize(
        context = activity,
        appKey = "APP_KEY",
        adTypes = adTypes,
        callback = object : ApdInitializationCallback {
            override fun onInitializationFinished(errors: List<ApdInitializationError>?) {
                // Appodeal initialization finished
            }
        }
    )
}
@Override
protected void onCreate(@Nullable Bundle savedInstanceState) {
    super.onCreate(savedInstanceState);
    /// Any other pre-initialization
    /// app specific logic

    Appodeal.initialize(activity, "APP_KEY", adTypes, new ApdInitializationCallback() {
        @Override
        public void onInitializationFinished(@Nullable List<ApdInitializationError> errors) {
            // Appodeal initialization finished
        }
    });
}
-
context- Activity of your application. -
Replace
APP_KEYwith the actual app key. You can find it in the list of applications in your personal account. -
adTypes- Ad formats. Initialize only those ad types you want to use in your app to avoid getting ad requests to unused ones. Use the type codes below to set the preferred ad format:Appodeal.INTERSTITIALfor interstitial;Appodeal.REWARDED_VIDEOfor rewarded videos;Appodeal.NATIVEfor native ads;Appodeal.BANNERfor banners;Appodeal.MRECfor 300*250 banners.
or operator.For example, Appodeal.INTERSTITIAL or Appodeal.REWARDED_VIDEO.
callback- Appodeal initialization callback. The initialization callback is used to determine the result of the Appodeal SDK initialization and is called when the initialization process is completed. If initialization succeeds, list of errors isnull. Otherwise, it contains a list oferrors.
Step 5. Configure Ad Types
Appodeal SDK is now imported and you're ready to implement an ad. Appodeal offers a number of different ad formats, so you can choose the one that best fits your app's user experience.
Step 6. What's next
Configure App Privacy
Fill in the Data safety section on Google Play according to this doc:
App Privacy Details
Add Privacy Policy
Make sure to add Privacy Policy to your app on Google Play that links to:
Google policy, location permissions may only be requested to provide features beneficial to the user and relevant to the core functionality of the app. You cannot request access to location data for the sole purpose of advertising or analytics. If you are not using location for the main functions of your app
- Remove location permission in your app by adding the following code to AndroidManifest.xml and under the tag.
<manifest xmlns:android="http://schemas.android.com/apk/res/android" xmlns:tools="http://schemas.android.com/tools"
    package="com.example.app">
<uses-permission android:name="android.permission.ACCESS_COARSE_LOCATION"
    tools:node="remove" />
<uses-permission android:name="android.permission.ACCESS_FINE_LOCATION"
    tools:node="remove" />
</manifest>
- Update the app on Google Play. During the publishing process, make sure there are no location warnings in Google Play Console.
If you are using location for the main functions of your app
-
Fill out the Location permissions declaration form in Google Play Console. You can read more about the declaration form here.
-
Update the app on Google Play. During the publishing process, make sure there are no location warnings in Google Play Console.
Some networks and 3rd party dependencies (related to network dependencies) can include their own permissions to the manifest. If you want to force remove such permissions you can refer to this guide.
Add App-ads.txt File
The app-ads.txt file is a text file which provides a mechanism for publishers to declare their authorized digital sellers.
You can find detailed information here