Ad server
Ad Server allows you to cross-promote your apps or launch ad campaigns for direct advertisers who are paying you. It supports different types of creatives to use: Banners, Static Interstitials, MREC, Video, Rewarded Video and Native.
1. Creating and Editing Campaigns
1.1. Campaigns list
When you click on the "Ad Server" button on the left menu, you’ll see a list of Ad Server Campaigns with some basic information:
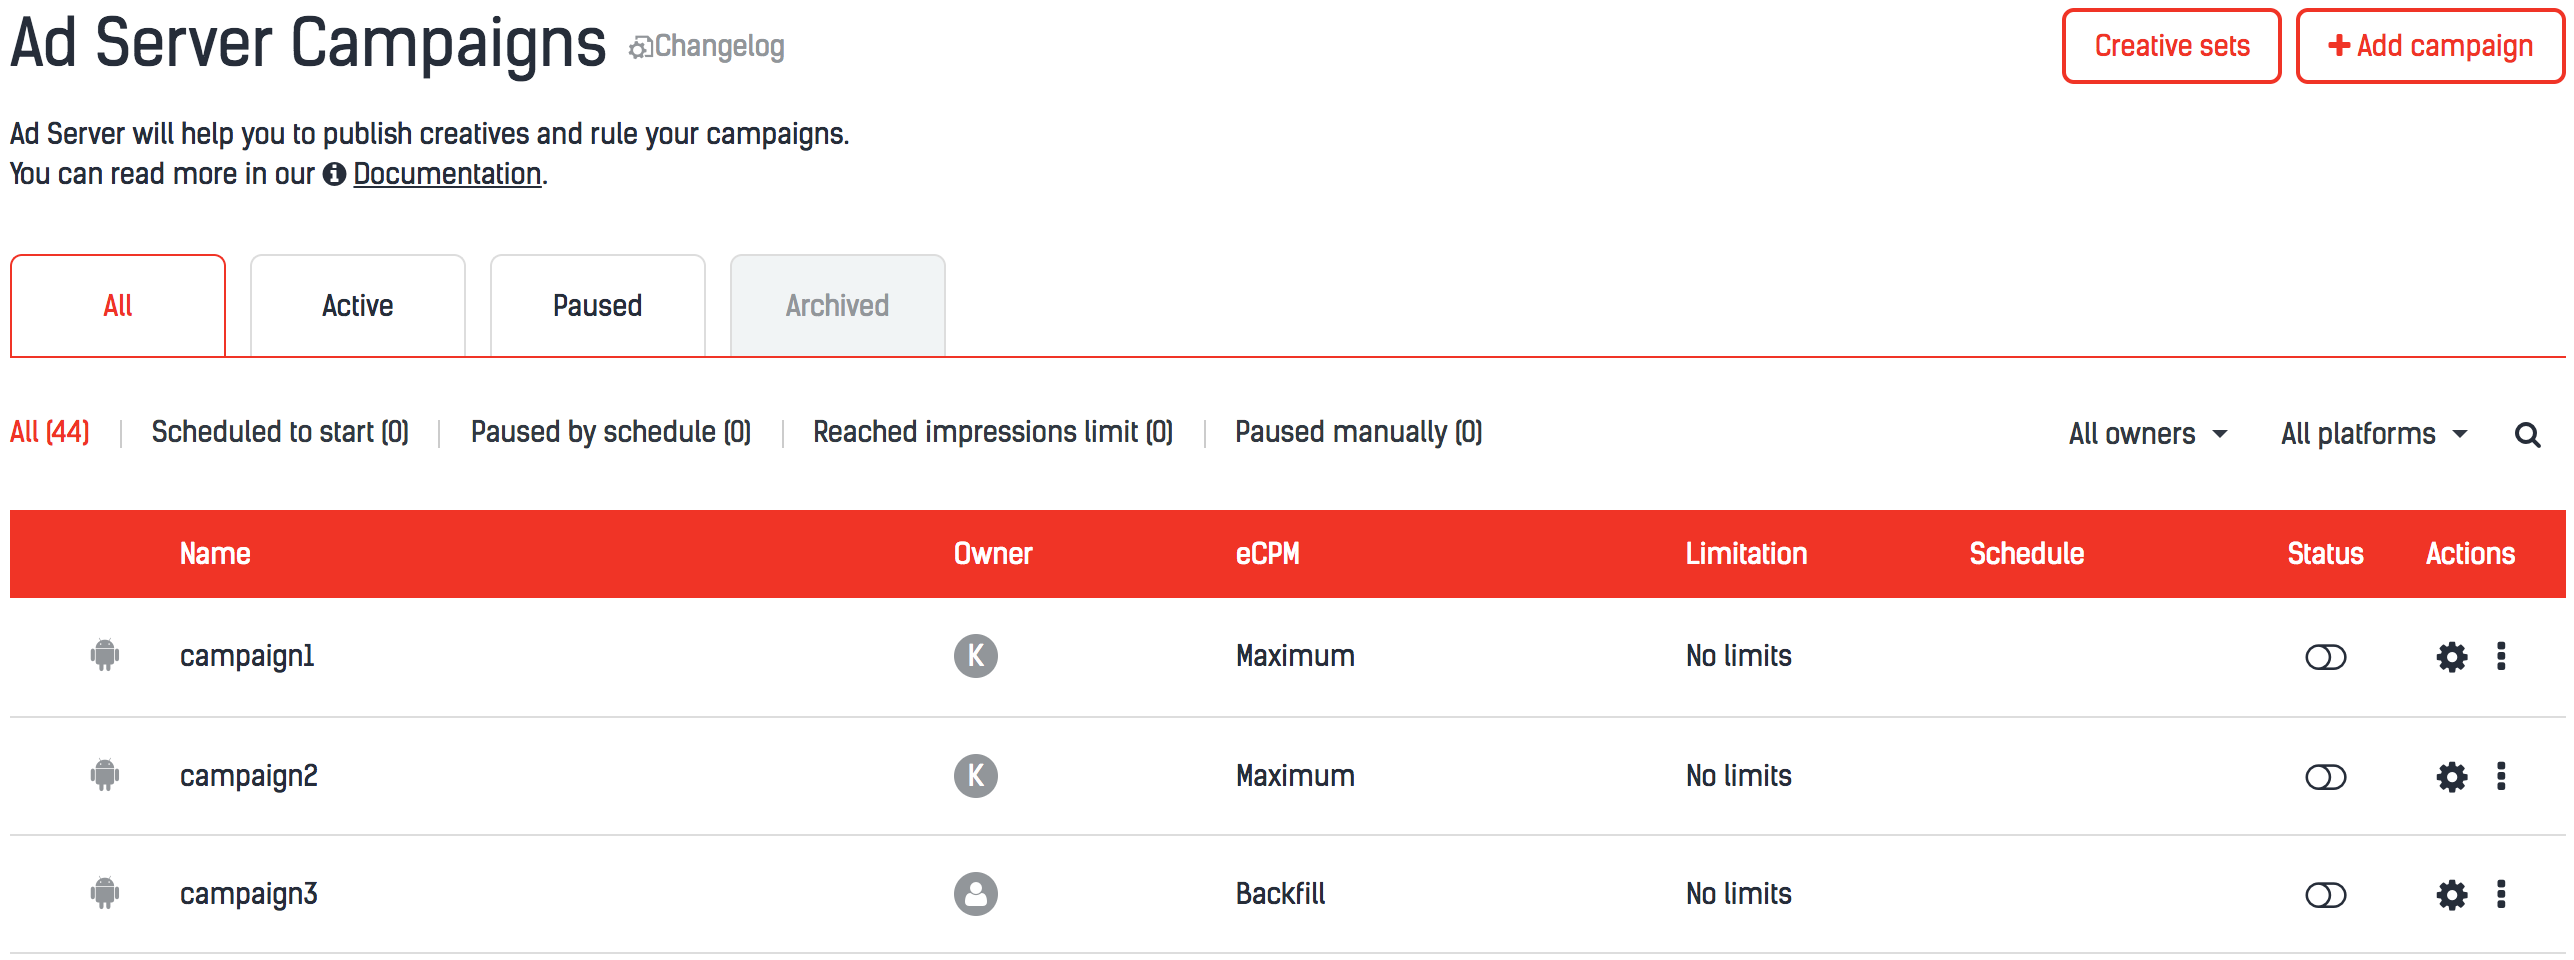
To see and manage creative sets you already have (or to create a new one), click on the "Creative Sets" button. Other elements on this page are directly related to your campaigns. Columns "Name", "Owner" and "eCPM" show you exactly what they mean. "Limitation" column shows any frequency capping limitations in the campaign. "Schedule" column shows start/end dates if they exist. With the button in the "Status" column, you are able to turn on/off your campaign.
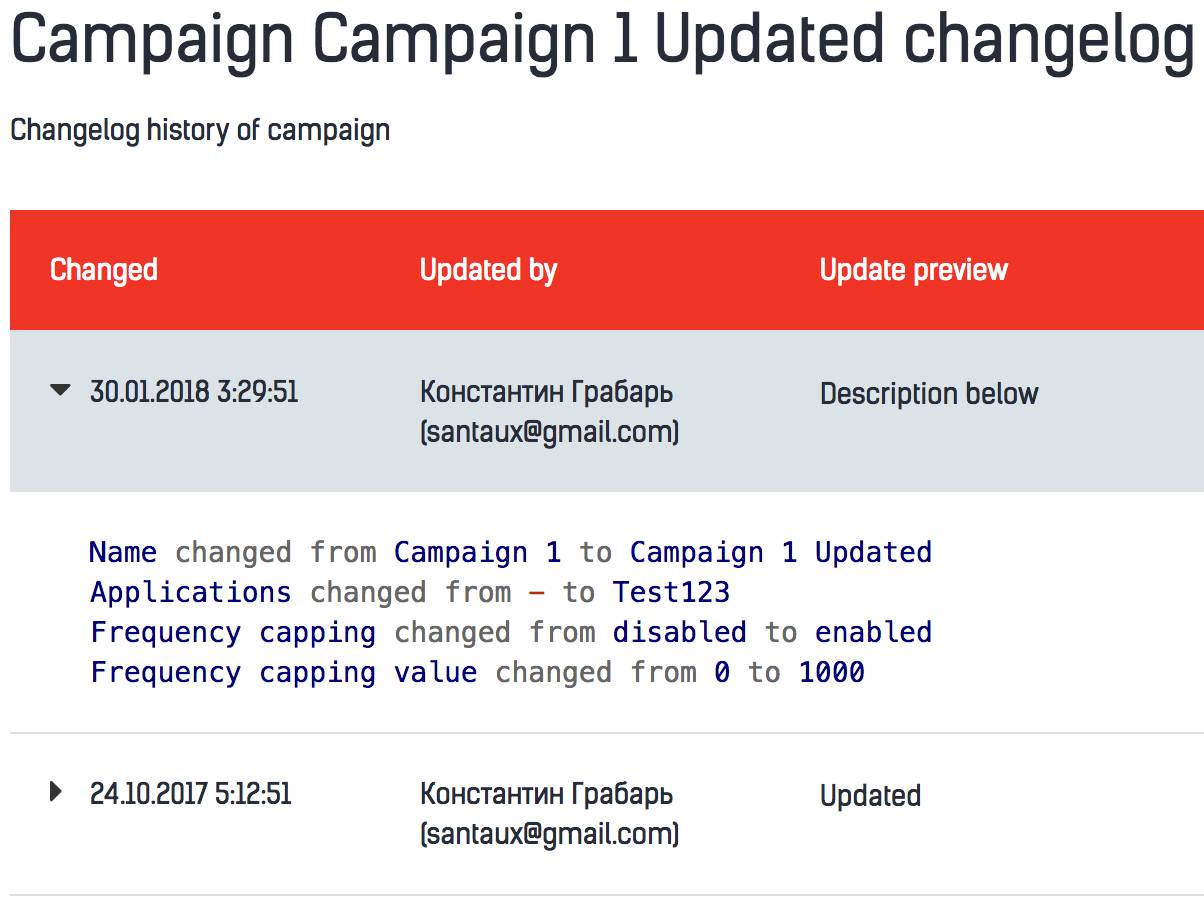
The gear icon in the "Actions" section allows you to edit a created campaign, and the white cross icon allows you to completely delete the campaign. Also, you can see campaign statistics for a week after by clicking on the "Statistics" button in the menu or copy the campaign by clicking on the "Copy campaign button". Finally, there is an option to see all campaign changes that have been made over a whole period:
1.2. Creating and editing campaigns interface
The process of creating a new campaign starts when you click on the "Add campaign" button. After that, you will see this:
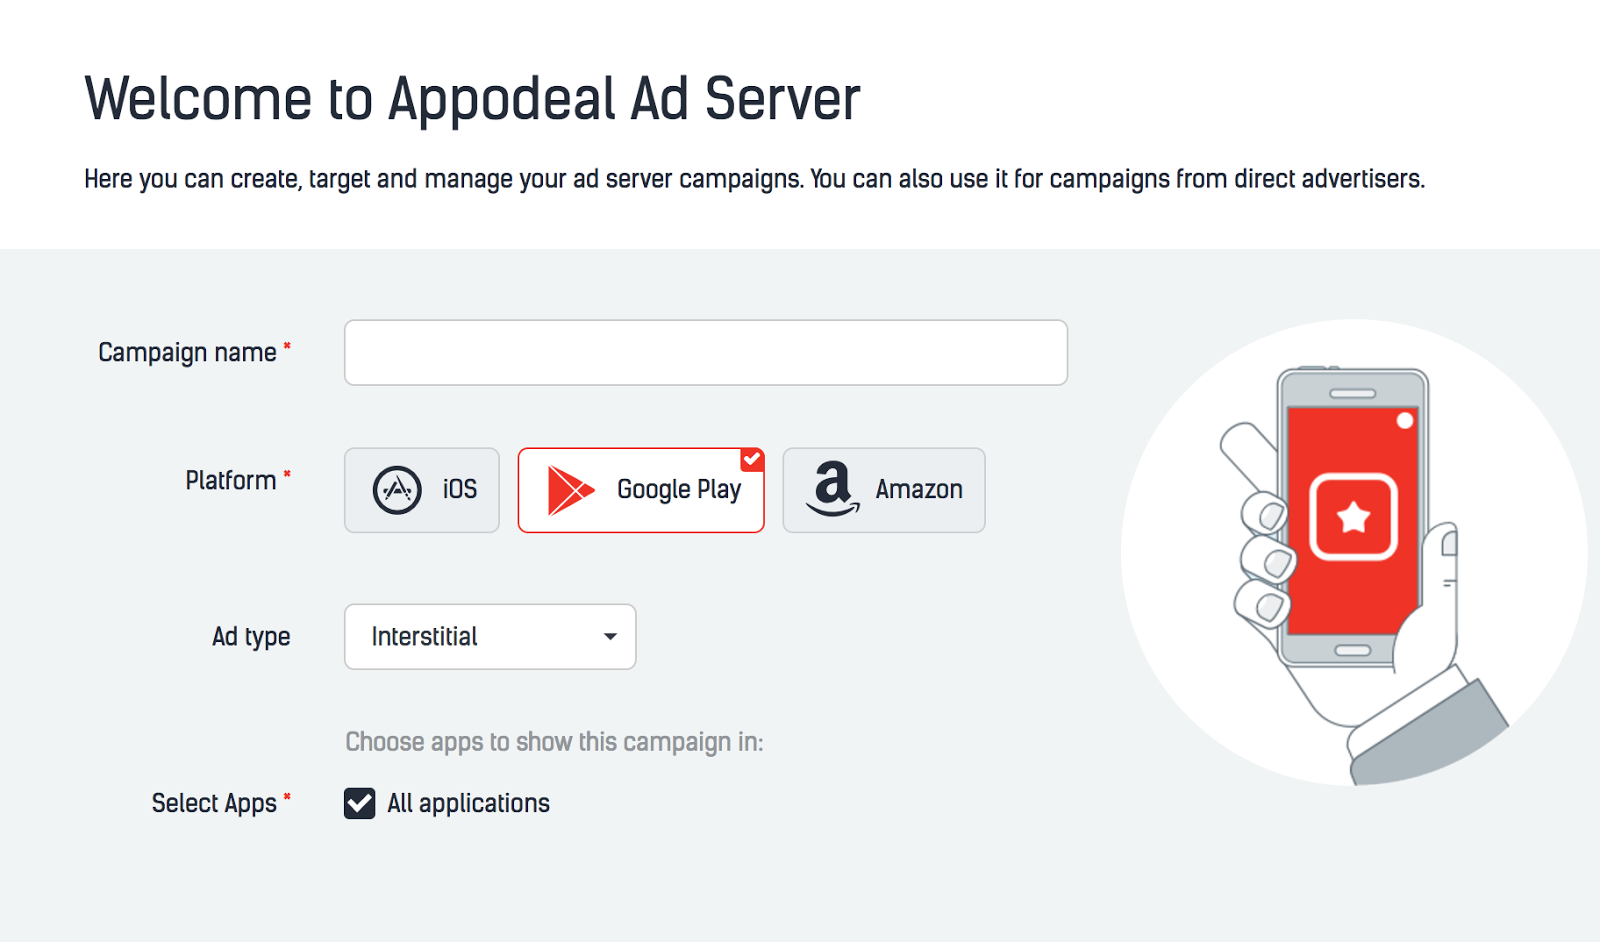
All required fields are marked by the red star on the right corner of the label. You must set these fields:
- Campaign name
- Platform
- Ad Type
- Select Apps (your applications where you will show your ads)
- Creative Set (you have to choose an existing creative set or create a new one)
- Choose priority of your campaign (Backfill, Maximum or input eCPM manually)
- Click URL (where the user will be redirected after click on your ads)
You are able to set a lot of options to target or limit your campaigns (described in the next sections).
After your campaign is created, you can launch it from the page of this campaign:

Or launch it from the campaign’s list page by clicking on this button:
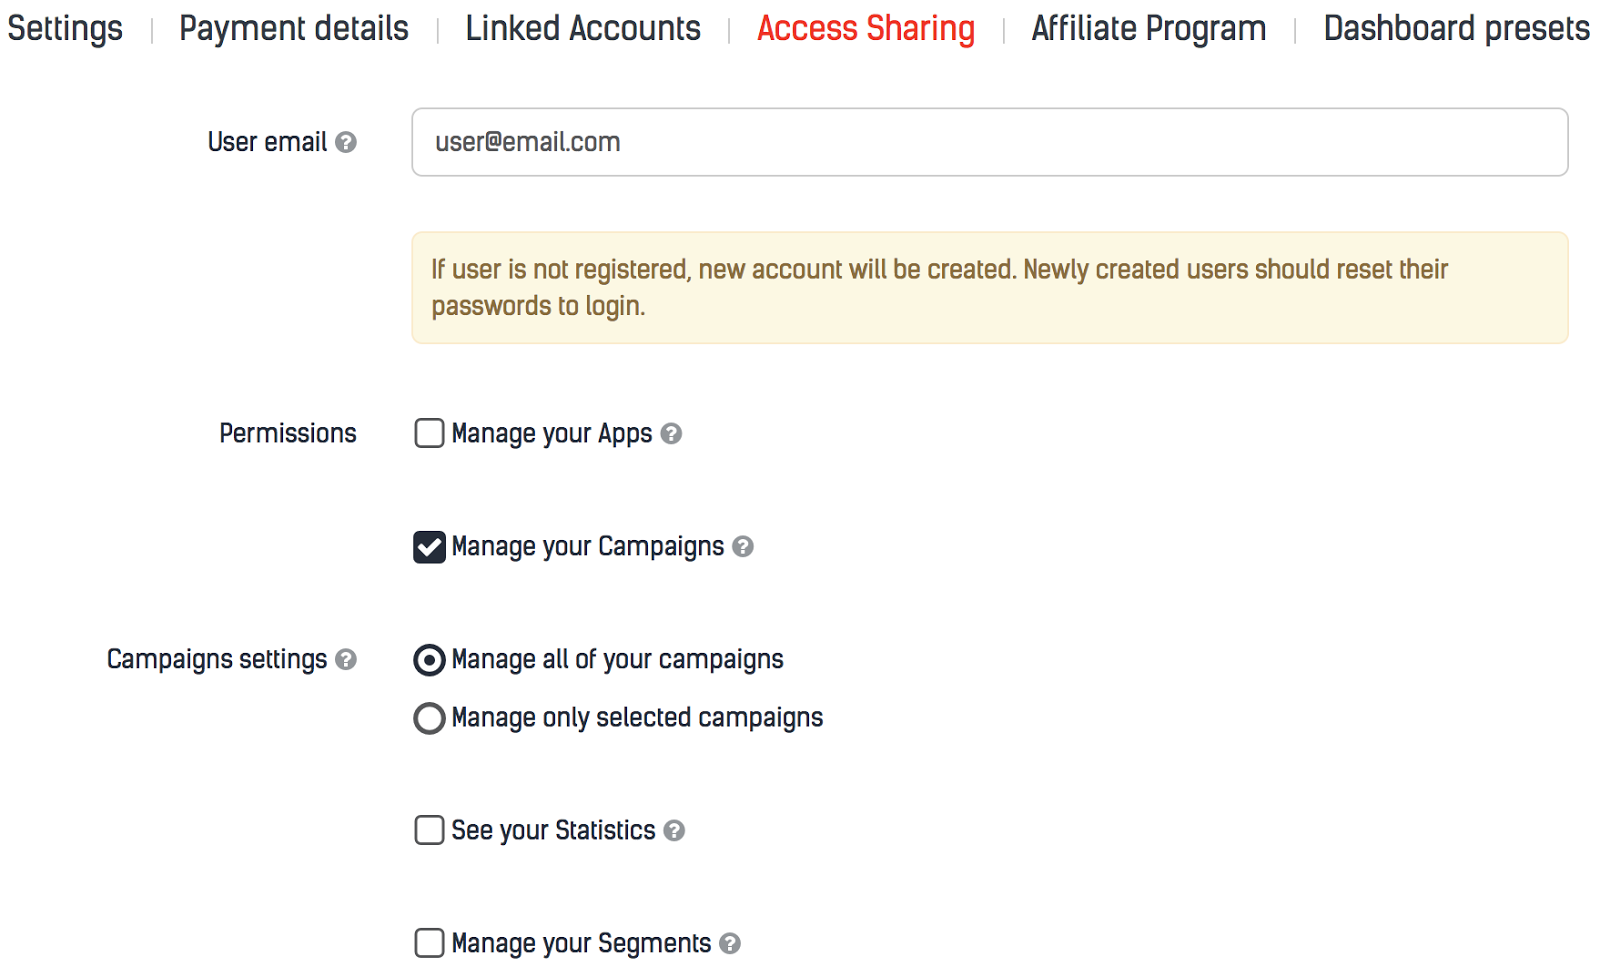
1.3. Sharing campaign’s access rights
Also, you can share your campaign’s creation and editing rights with other users. To do this:
- Go to Access Sharing page;
- Click on "Grant Access" button;
- Choose "Manage your Campaigns";
- Select the campaigns you want to share or just leave everything as is ("Manage all of your campaigns" is the option by default).
1.4. Your campaign’s statistics
You can see your campaigns statistics on the Dashboard by selecting "Ad Server Campaigns" in Filters -> Network (Monetization) :

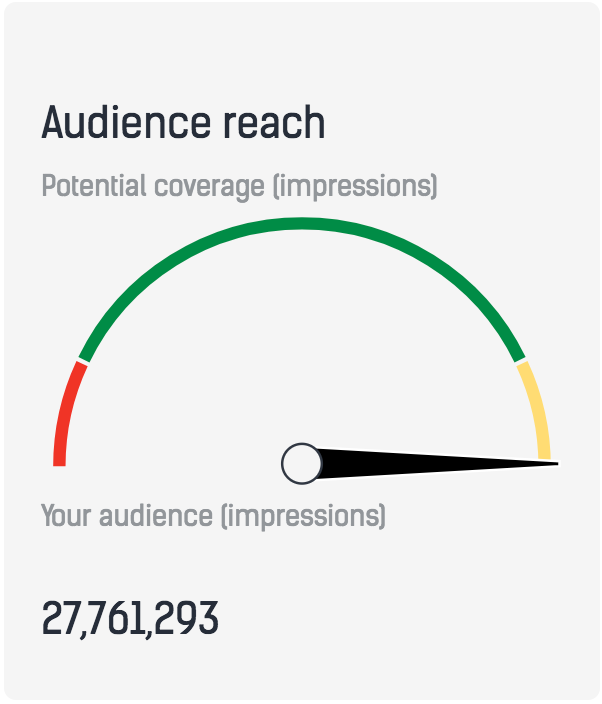
1.5. Audience reach
This feature allows you to estimate approximate impressions amount for your ad campaign. Prediction is based on your apps historical performance for the previous day. Also, the prediction doesn't use these parameters:
- limit time between impressions for the unique device by ... minutes;
- limit impression amount for the unique device by .. session;
- never show on a device after install / click;
- campaign Start / End;
- schedule.
2. Creative Sets
2.1. Creative sets list
As mentioned before in the previous section, to see all creative sets (or to create a new one), click the "Creative Sets" button on the campaigns list page. You will then be redirected here.
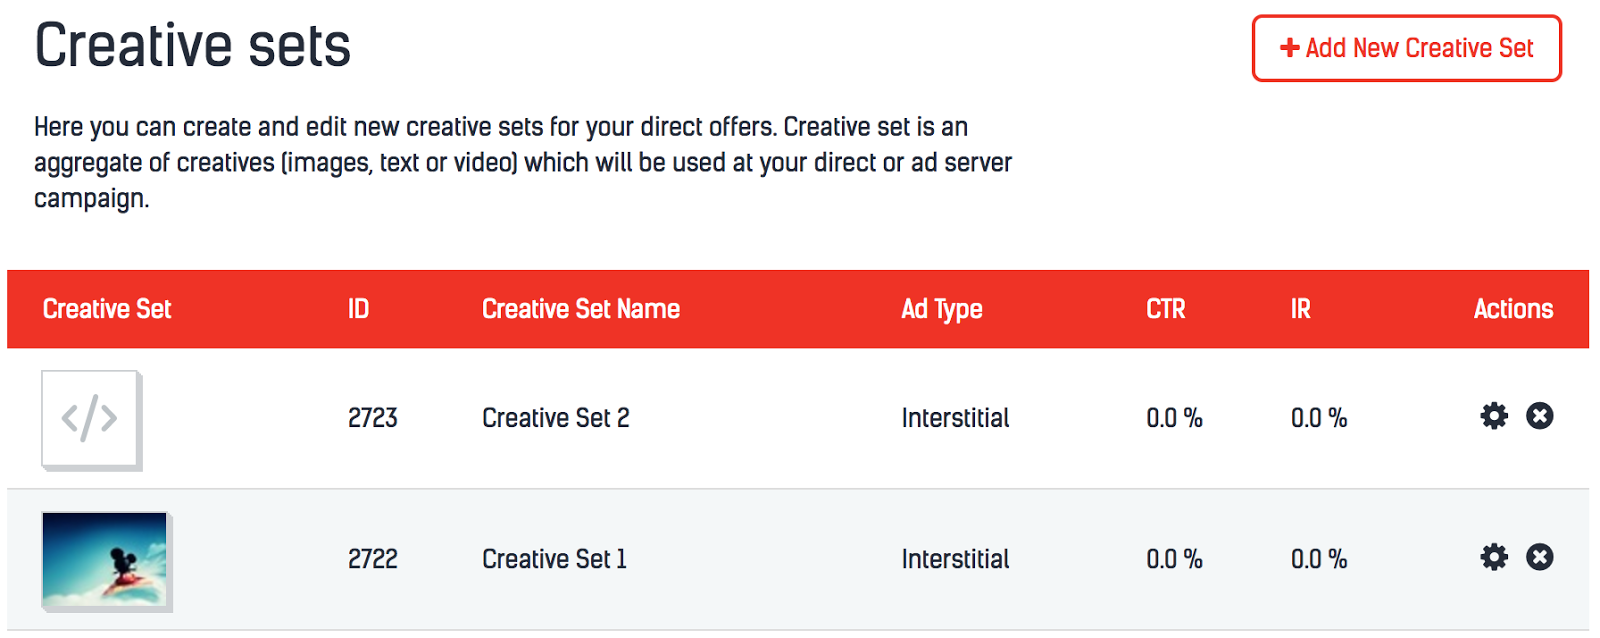
To edit any creative set, click on the creative thumbnail or gear icon button in the "Actions" column or delete any set you want by clicking on the cross icon button. Also, please know that it's not possible to delete a creative set that is already being used in one of the campaigns.
Beware of editing creative sets that are already used in some campaigns, as it will affect all of the campaigns.
2.2. Creating and editing interface
You can create creative sets of several ad types:
- Interstitial;
- Banner;
- MREC;
- Native;
- Video;
- Rewarded Video.
Each type has its own options, restrictions and possible creative sizes.
2.3. Interstitial creative sets
You can load one or several creatives as one of these sizes:
- 900 x 1600 px;
- 900 x 1400 px;
- 1120 x 1500 px;
- 320 x 480 px;
- 1600 x 900 px;
- 1560 x 750 px;
- 1500 x 1120 px;
- 480 x 320 px;
- 768 x 1024 px;
- 1536 x 2048 px;
- 1024 x 768 px;
- 2048 x 1536 px.
Possible formats are JPG and PNG images under 1MB.
Previously uploaded creatives are marked by a red check mark. To see each creative in the box on the left side, click on the size label.
2.4. Banner creative sets
You can load one or several creatives as one of these sizes: 320x50, 640x100, 728x90 px. Possible formats are JPG and PNG images under 1MB.
Previously uploaded creatives marked by a check mark and are in red. To see each creative in the box on the left side, click on the size label.
2.5. Interstitials and banners common options
When you load different creative interstitial or banner sets into the waterfall on a device, the creative that’s the closest to the user's device dimensions will be selected. Our algorithm also takes into account the device’s screen orientation.
You can also add a creative as a manual HTML code:
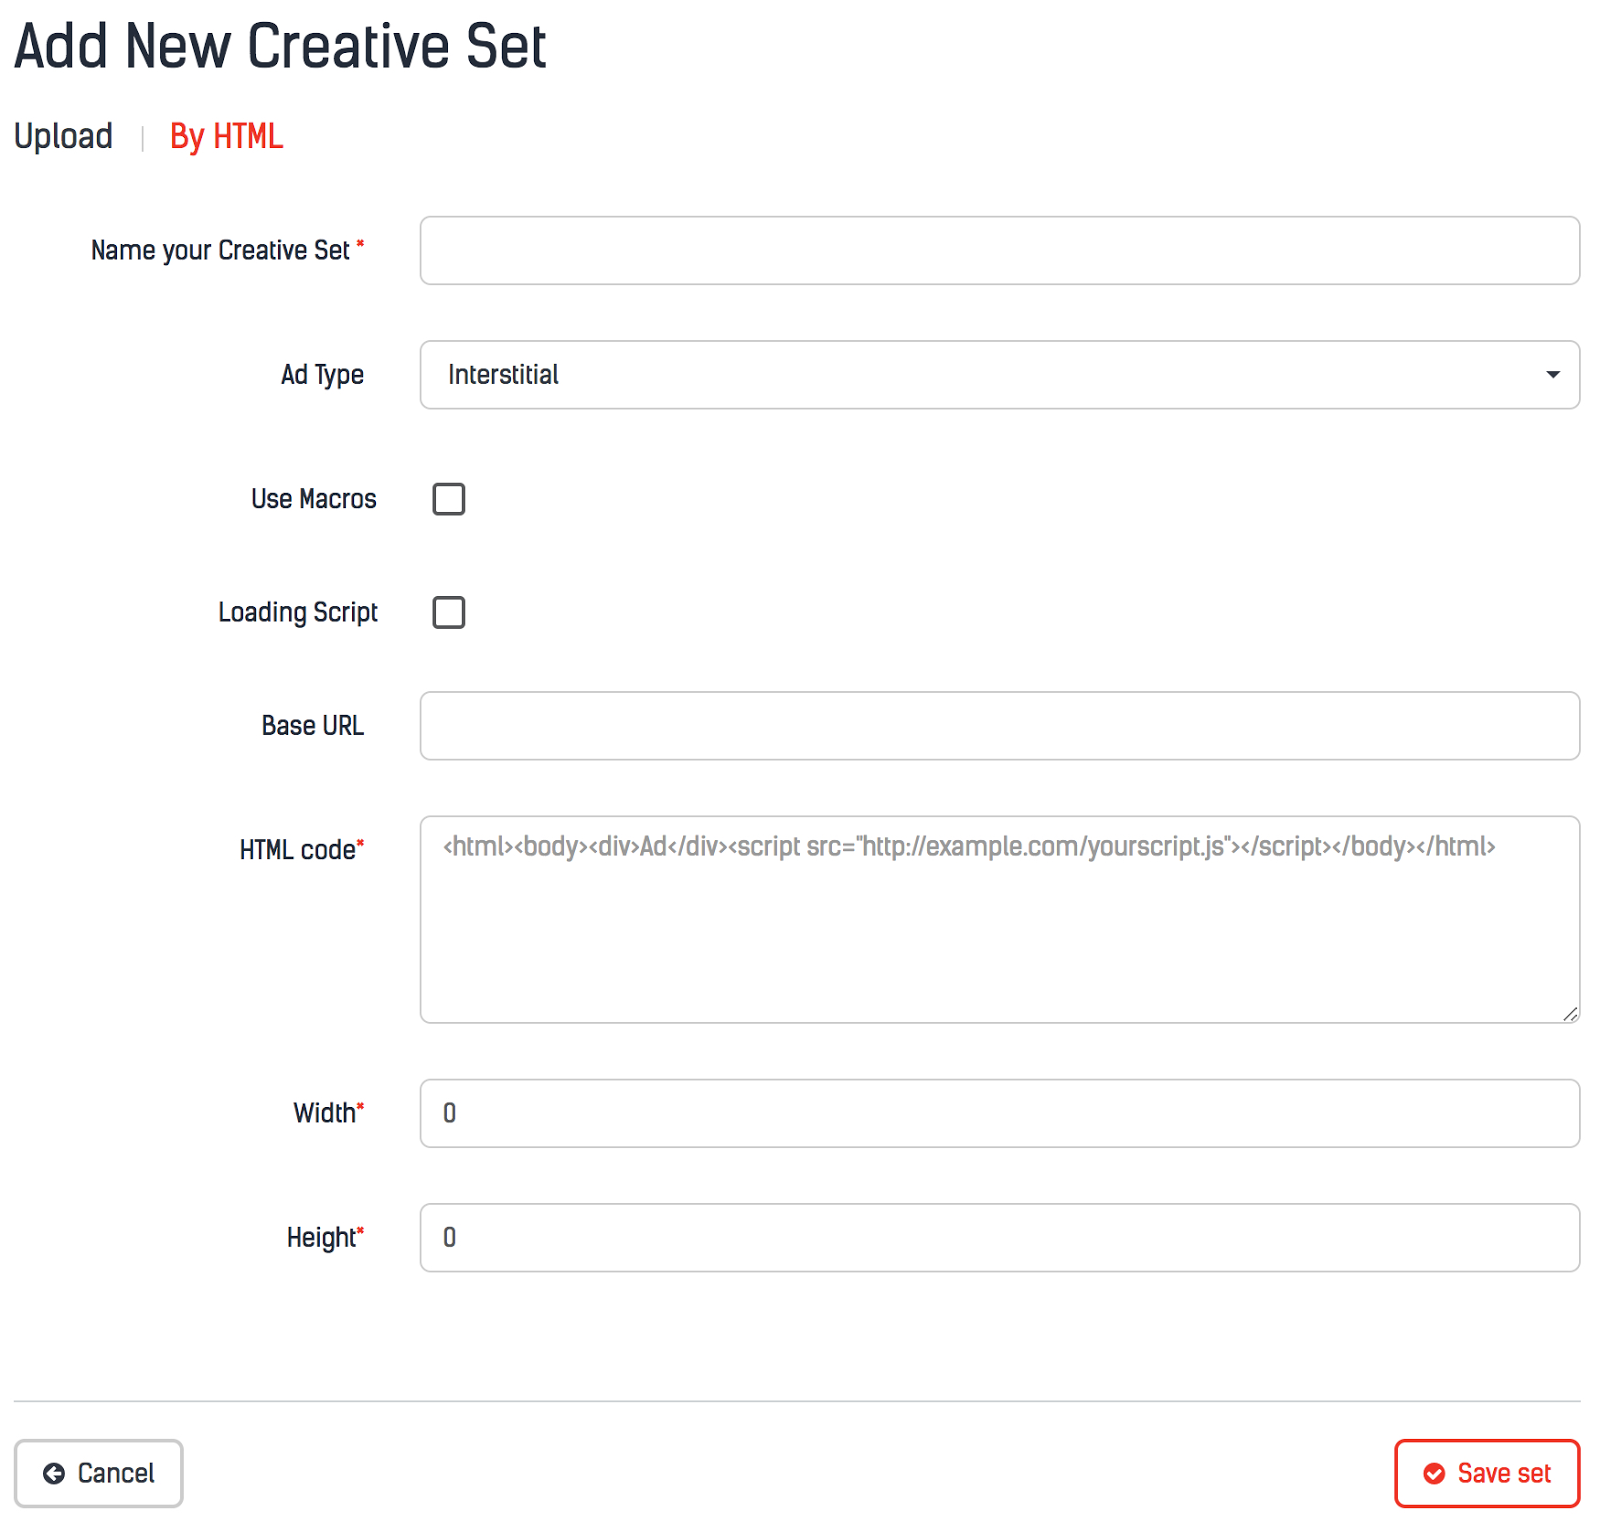
This is relevant to advanced users who want to launch direct campaigns for an advertiser who has a "JS tag", or just a simple HTML code that loads interstitials or banners with some JS scripts.
You have several options here (required options are marked by red asterisks):
- "Name your Creative Set": Simply the name of your creative set.
- "Use Macros": To use one of the macros listed below, which will be replaced by some values dynamically during waterfall creation.
- "Loading Script": This checkbox tells the SDK to wait until some ads are loaded with JS scripts inside your HTML creative.
- "Base URL": If you have URLs with a blank base (http://, https://, etc.), these urls will be modified with the base URL from these fields (e.g., //appodeal.com/ will be replaced with http://appodeal.com if you have http:// in this field).
- "HTML Code": This is the field where you should put "JS Tag" or another HTML code you have and would like to launch on your apps.
- "Width": Width of the interstitial/banner.
- "Height": Height of the interstitial/banner.
2.6. MREC creative sets
MREC creative set creating/editing interface:
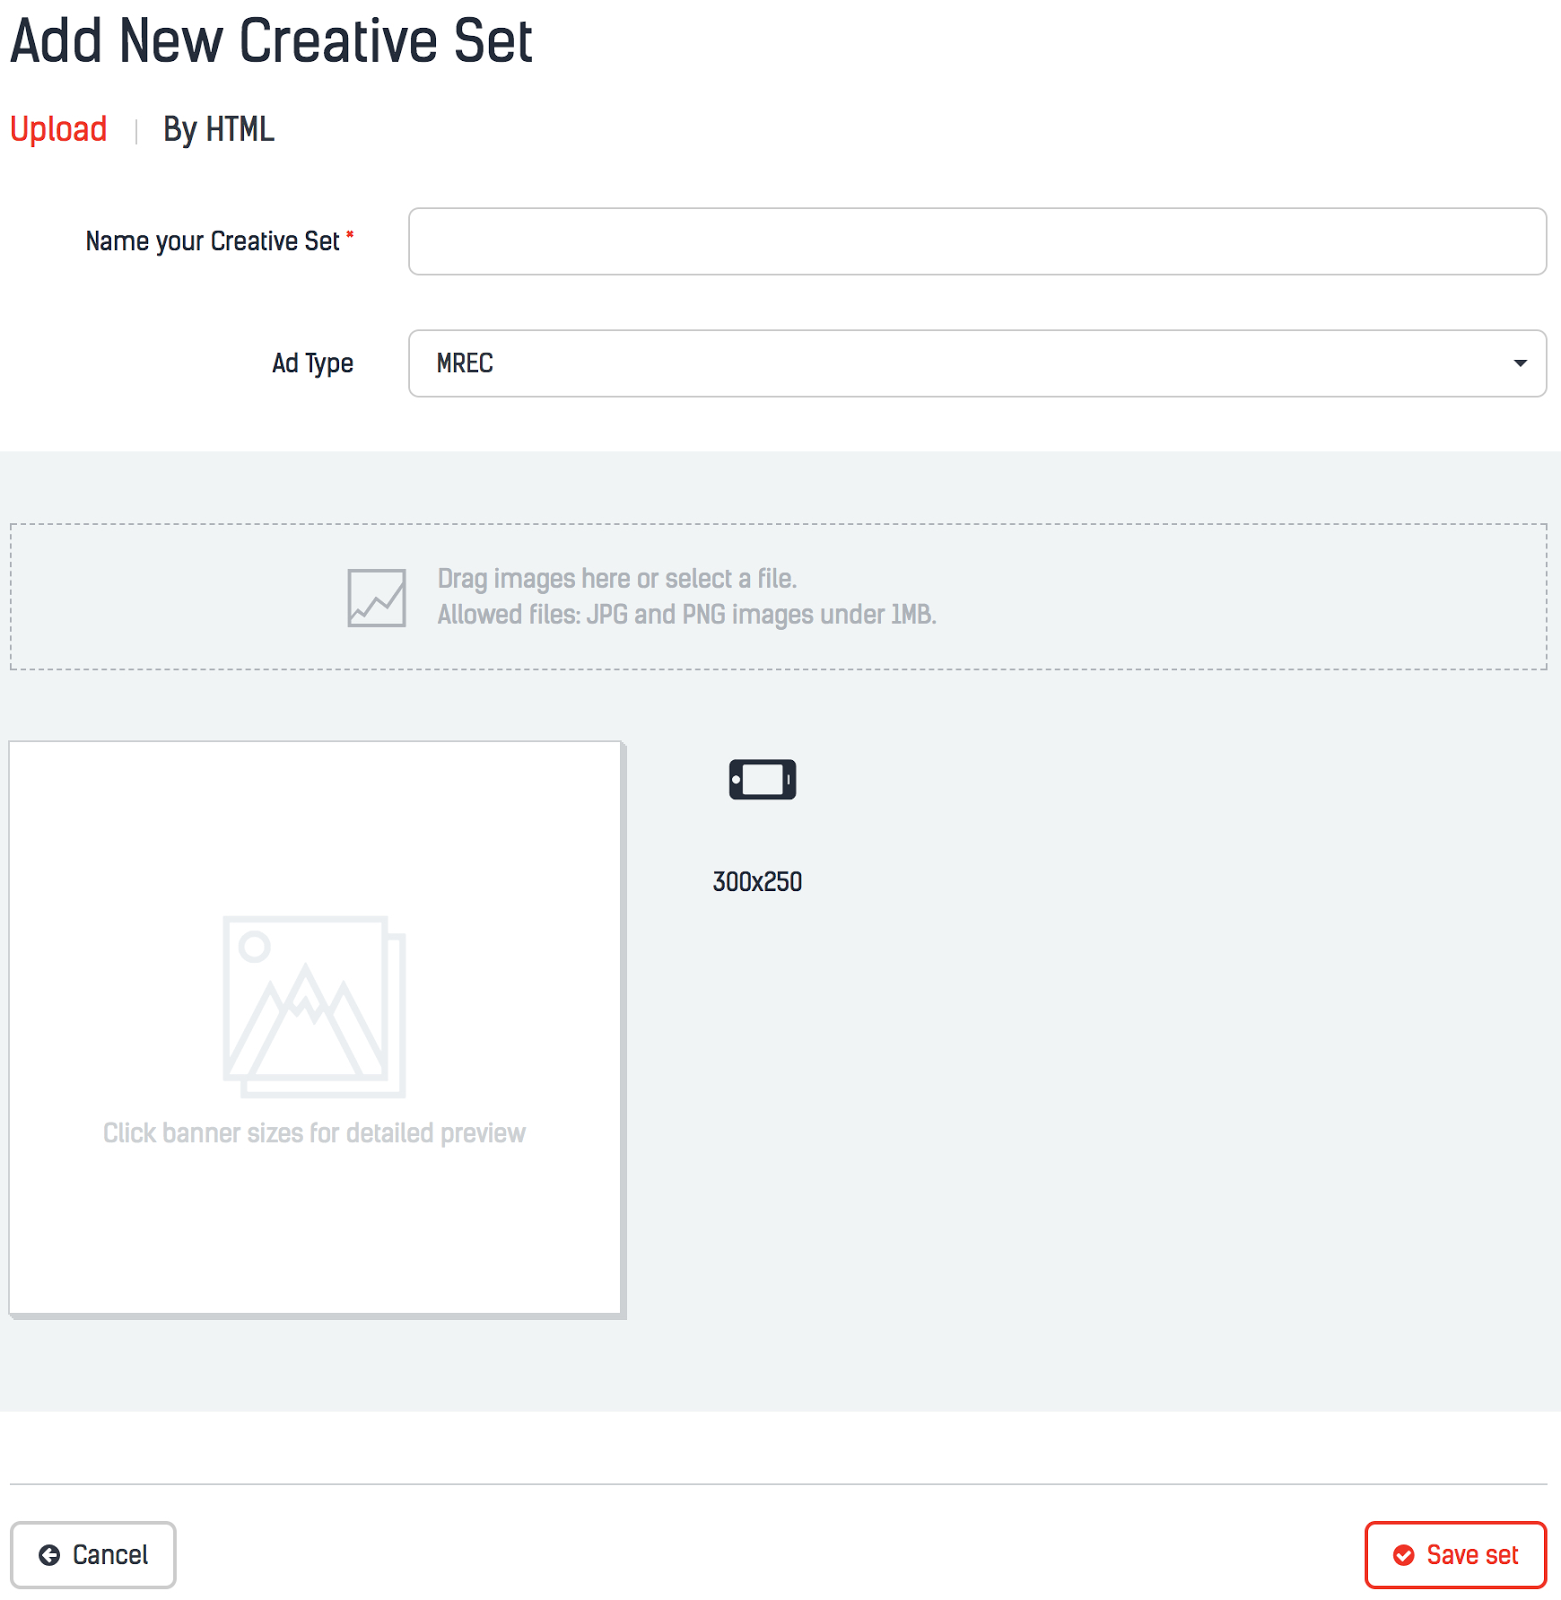
You are able to load only one creative with size 320x250 px. Possible formats are JPG and PNG images under 1MB.
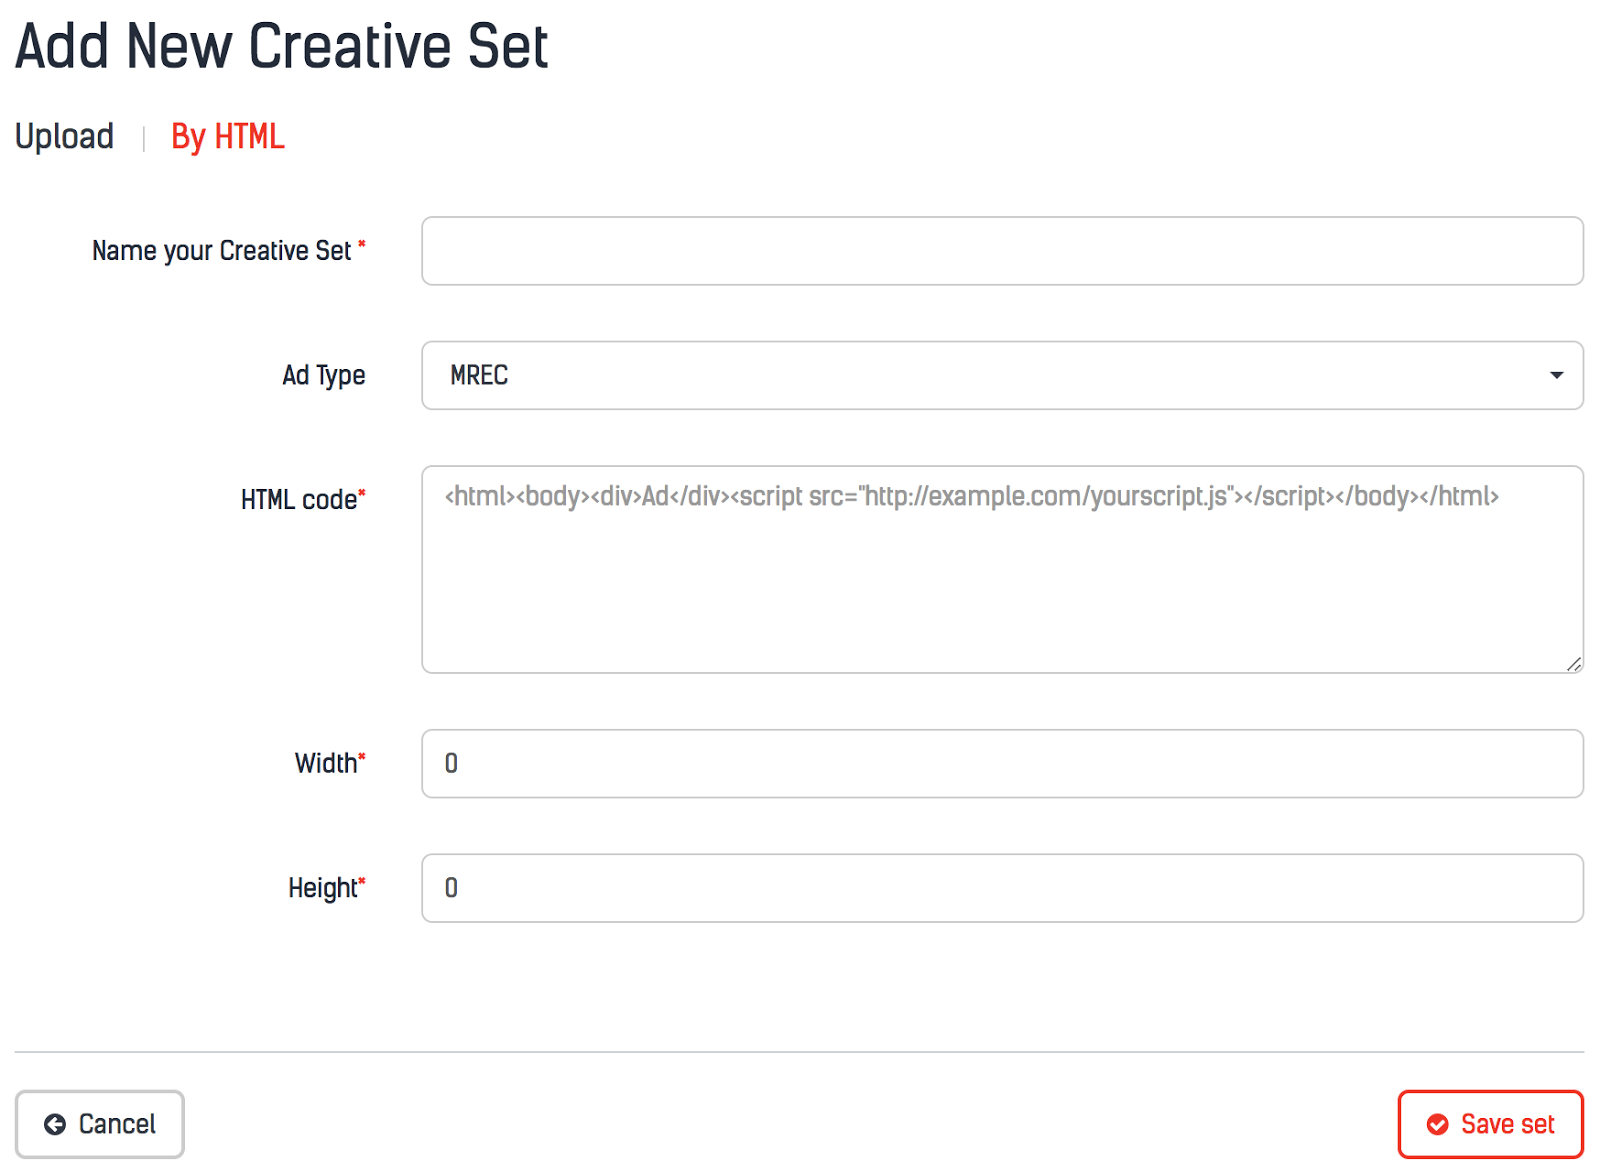
As in the cases of banners and interstitials, you can use your custom HTML code as MREC creative (but without macros, “Base URL” or “Loading Script” options):
2.7. Native creative sets
Native creative set creating/editing interface:
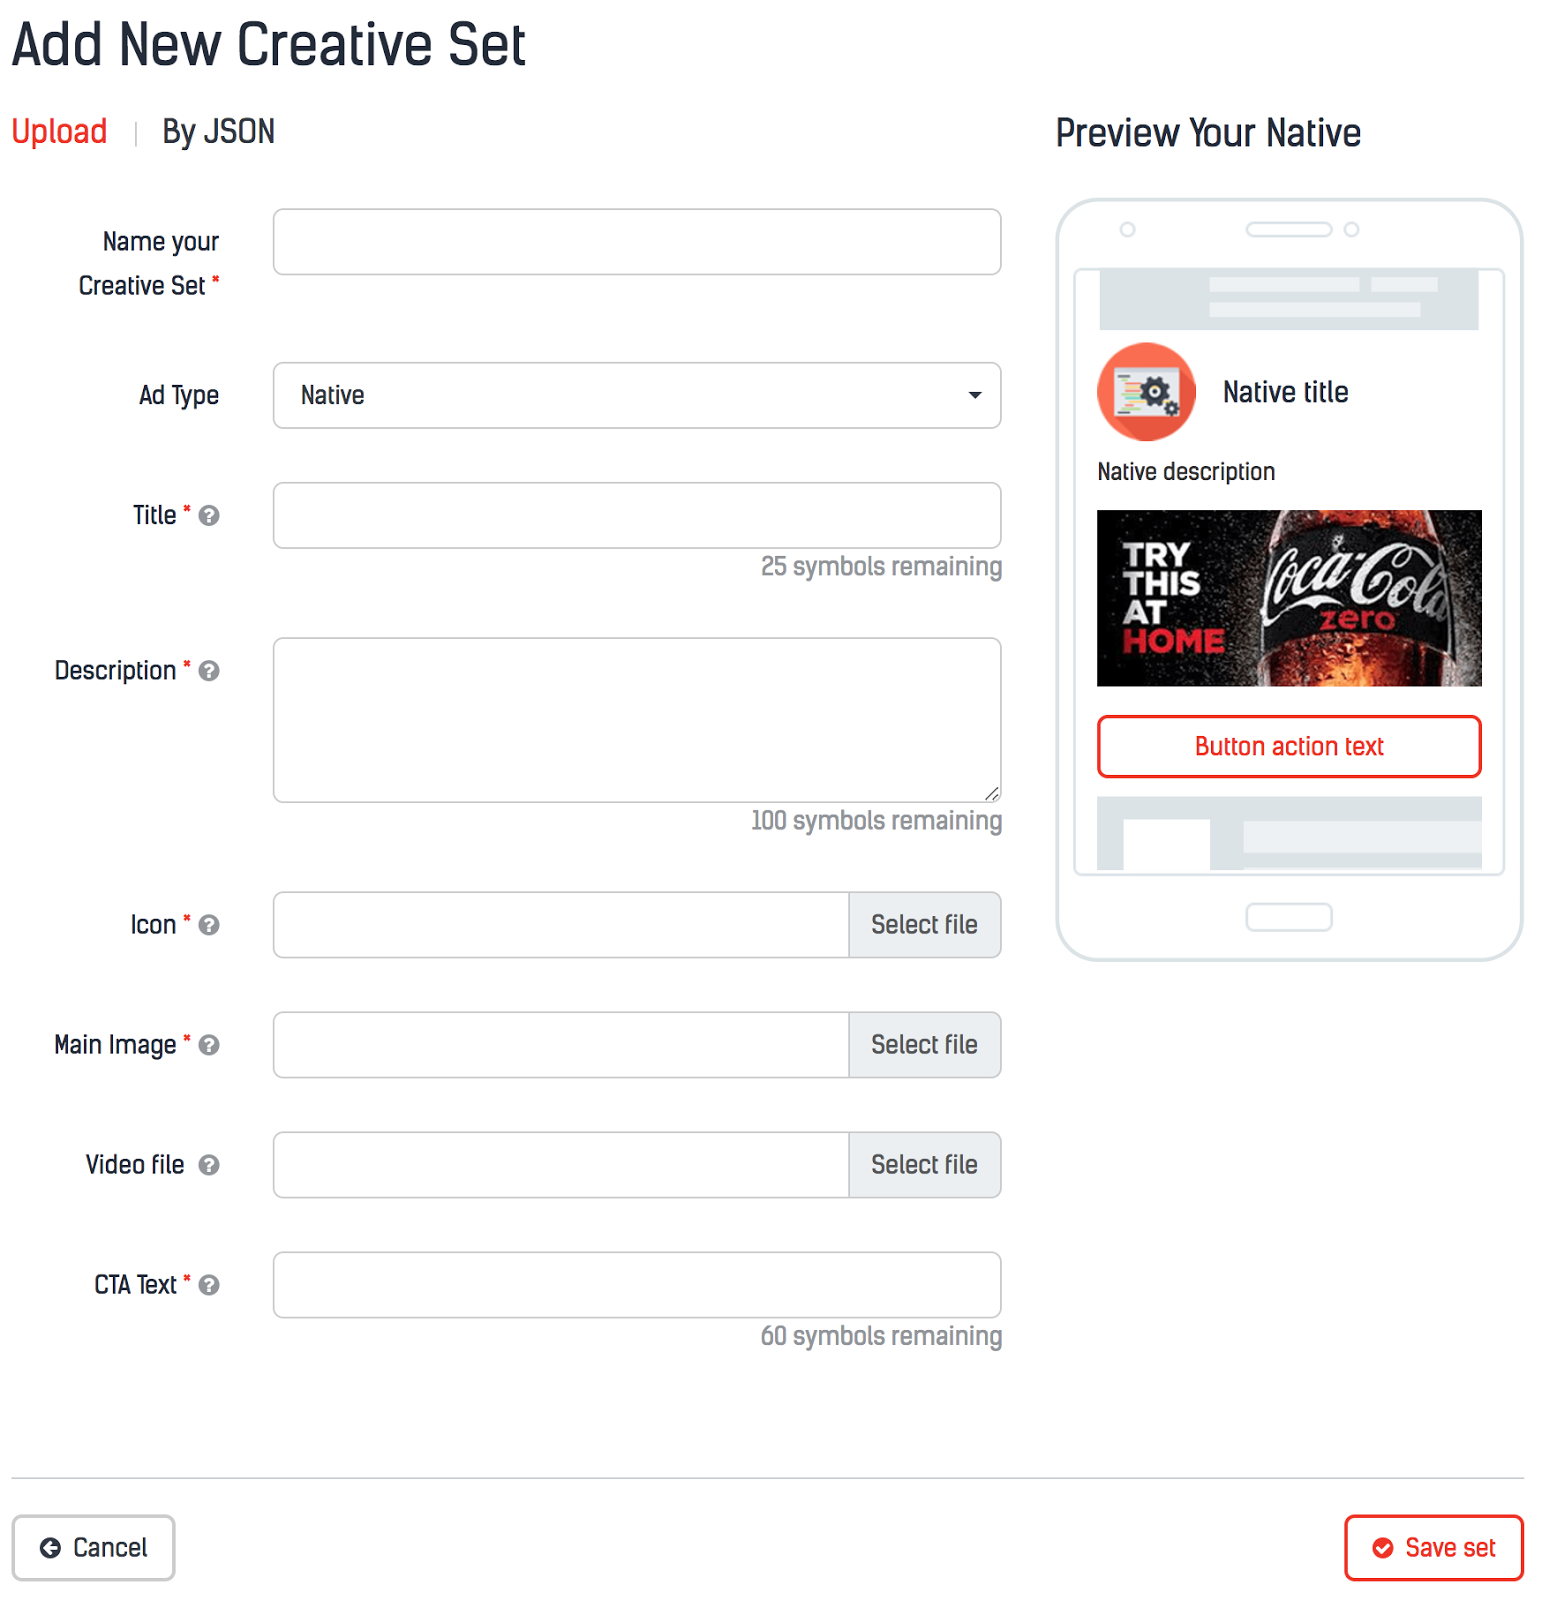
All required fields are marked by the red star. The options you have here:
- "Name your Creative set": Just a name of your set.
- "Title": Title at the upper part of the ads not more than 25 symbols long.
- "Description": Text in the middle of the ads not more than 100 symbols long.
- "Icon": URL to a small picture (512x512px).
- "Main Image": URL to the main picture (1200x627px).
- "Video file": URL to the video if you have one.
- "CTA Text": Label of the button.
You can see an example of how this creative will be rendered on a user's device at the right part of the page.
Also, you have the ability to input JSON for your native creative manually:
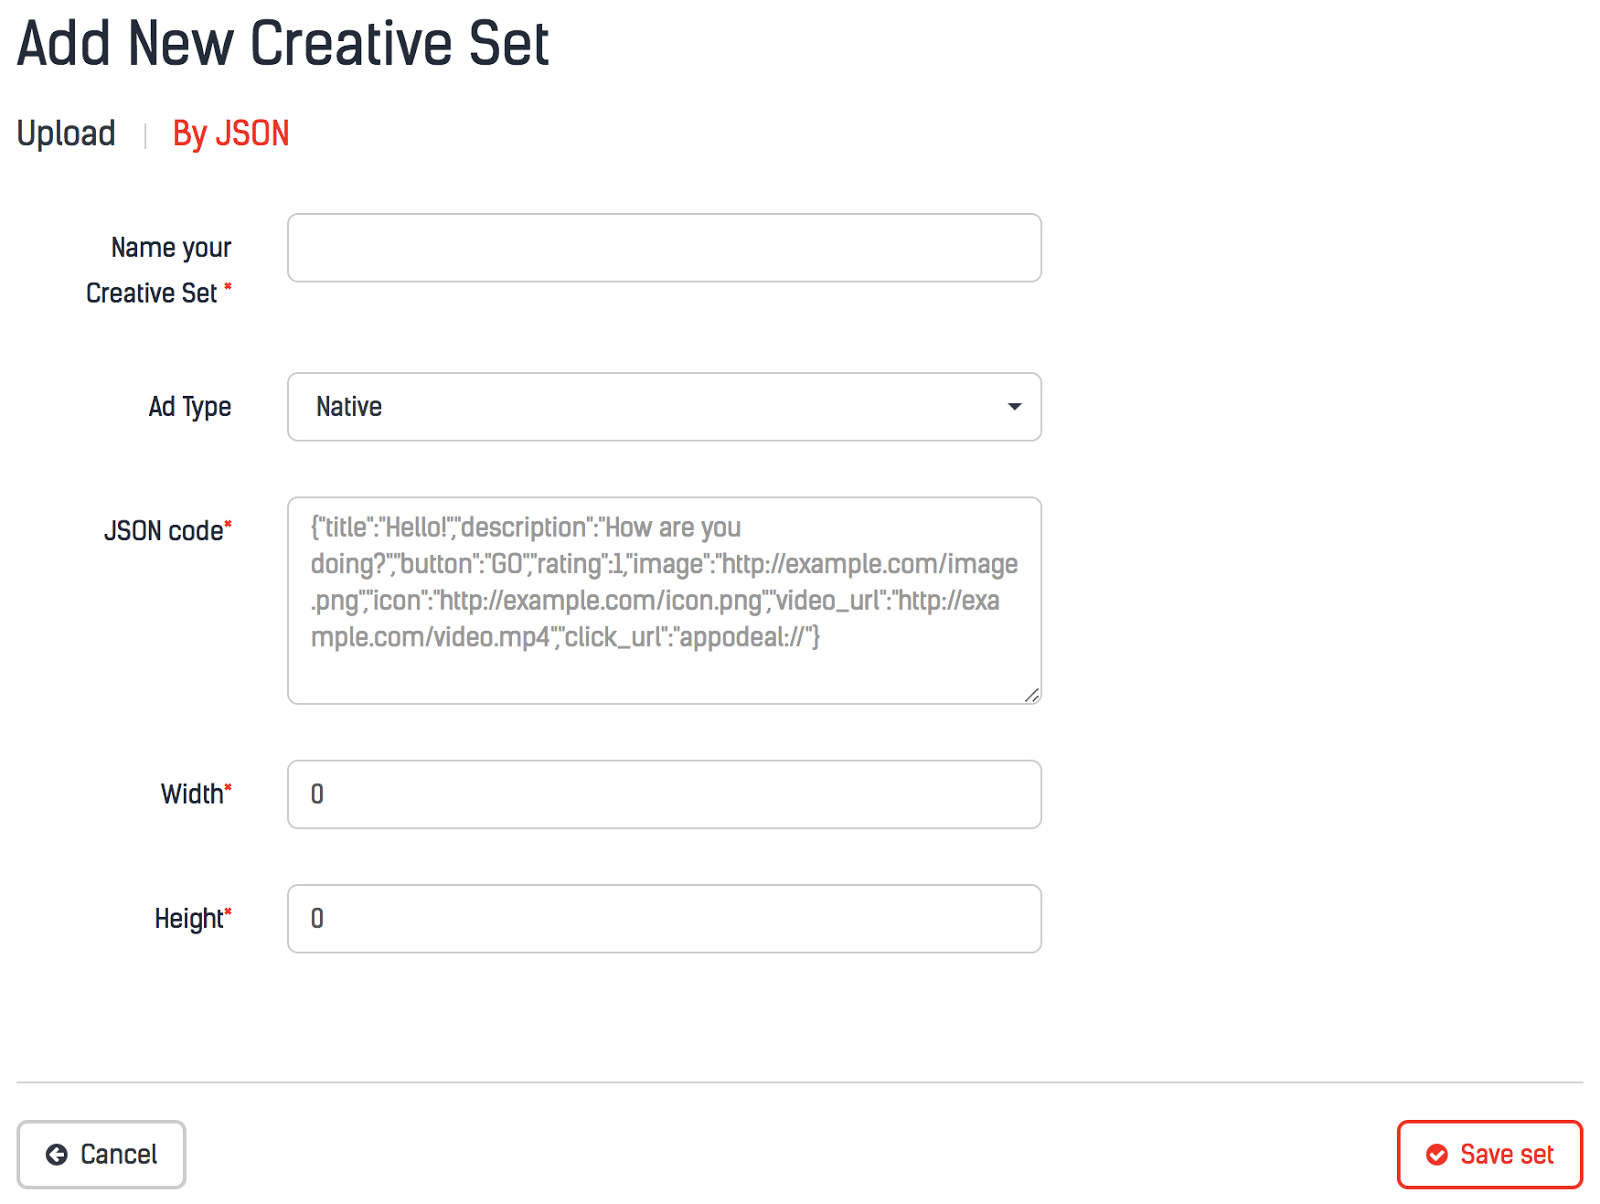
The example text input consists of these fields:
- "title": Title at the upper part of the ads (not more than 25 characters long).
- "description": Text in the middle of the ads (not more than 100 characters long).
- "button": Label of the button.
- "image": URL to the main picture (1200x627px).
- "icon": URL to a small picture (512x512px).
- "video_url": URL to the video (if have one).
- "click_url": where the user will be redirected to after clicking on your ads.
2.8. Video and Rewarded Video creative sets
Video and Rewarded Video differ from each other only in type (rewarded or not). The interface looks like this:

You can load these types of creatives:
- "Video File": .mp4 file encoded with H264 codec with 1280x720 px dimensions under 5 Mb and 30 seconds long.
- "Portrait End-screen Banner": Banner image for portrait screen orientation with 900x1600 px dimensions under 1 Mb.
- "Landscape End-screen Banner": Banner image for landscape screen orientation with 1600x900 px dimensions under 1 Mb.
You can also input URLs to track several VAST 3.0 events such as: Start Event, First Quartile Event, Midpoint Event, Third Quartile Event, Complete Event, Creative View Event, Mute Event, Unmute Event, Pause Event, Resume Event, Fullscreen Event. If you want to know more about VAST 3.0, you could read this specification.
One of the variations to create a video/rewarded video creative set is to use a VAST tag URL:
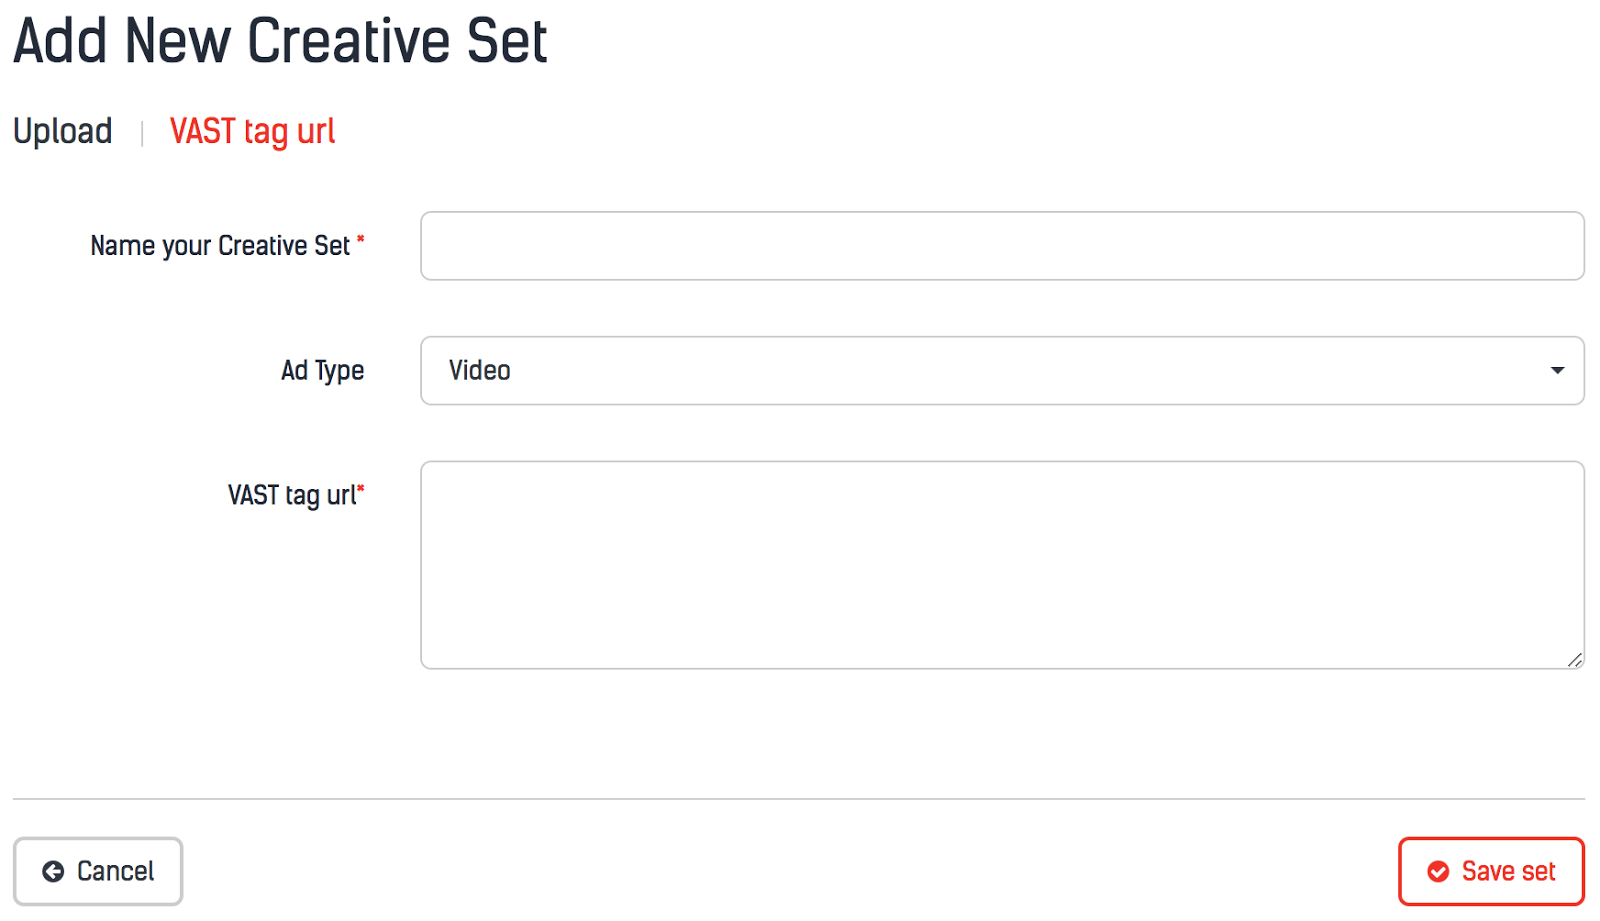
2.9. HTML and Vast tag macros
You can use same macros in HTML and Vast tag creatives. The list of macros is below:
-
{%CRR%}: The value of 'crr' param being sent by SDK. This is a combination of mobile country code and mobile network code. -
{%URL_ENCODED_CRR%}: The same thing as{%CRR%}but URL encoded. -
{%SDK_VERSION%}: SDK version (iOS only). -
{%ADVERTISING_TRACKING%}: advertising_tracking parameter sent by SDK. -
{%WIDTH%}: Device screen width. -
{%HEIGHT%}: Device screen height. -
{%IDFA%}: IDFA of a device (iOS only). -
{%IDFA_MD5%}: MD5 hash of device's IDFA (iOS only). -
{%IDFA_HEX%}: SHA1 hash of device's IDFA (iOS only). -
{%ADVERTISING_ID%}: Advertising ID of a device (Android only). -
{%ADVERTISING_ID_MD5%}: MD5 hash of device's Advertising ID (Android only). -
{%ADVERTISING_ID_HEX%}: SHA1 hash of device's Advertising ID (Android only). -
{%CACHEBUSTER%}: Just a random MD5 hash. -
{%APP_ID%}: App ID from our database. -
{%APP_BUNDLE_ID%}: App bundle ID. -
{%URL_ENCODED_APP_BUNDLE_ID%}: URL encoded app bundle ID. -
{%APP_NAME%}: App name. -
{%URL_ENCODED_APP_NAME%}: URL encoded app name. -
{%APP_STORE_URL%}: App store URL. -
{%URL_ENCODED_APP_STORE_URL%}: URL encoded app store url. -
{%APP_VERSION%}: App version. -
{%URL_ENCODED_APP_VERSION%}: URL encoded app version. -
{%IP_ADDRESS%}: IP address. -
{%URL_ENCODED_IP_ADDRESS%}: URL encoded IP address. -
{%USER_AGENT%}: User agent of the device. -
{%URL_ENCODED_USER_AGENT%}: URL encoded user agent of the device. -
{%LATITUDE%}: Location latitude. -
{%LONGITUDE%}: Location longitude. -
{%CONNECTION_TYPE%}: Connection type (wifi, mobile). -
{%OS_NAME%}: Returns "iOS" or "Android". -
{%OS_VERSION%}: OS version. -
{%DEVICE_MODEL%}: User's device model. -
{%URL_ENCODED_DEVICE_MODEL%}: URL encoded user's device model. -
{%DEVICE_MANUFACTURER%}: User's device manufacturer. -
{%URL_ENCODED_DEVICE_MANUFACTURER%}: URL encoded user's device manufacturer. -
{%COUNTRY%}: Country code in ISO Alpha-3 format. -
{%DEVICE_TYPE%}: Device type as Integer. 4 - phone, 5 - tablet. -
{%ZIP%}: Zip or postal code based on geo data. -
{%UTC_OFFSET%}: Local time as the number +/- of minutes from UTC. -
{%COPPA%}: 0/1 flag signals whether or not the request falls under the United States Federal Trade Commission’s regulations for the United States Children’s Online Privacy Protection Act (“COPPA”). -
{%LMT%}: “Limit Ad Tracking” signal commercially endorsed, where 0 = tracking is unrestricted, 1 = tracking must be limited per commercial guidelines. -
{%CITY%}: City name. -
{%GDPR%}: 0/1 flag signals whether or not GDPR is applicable for the region. -
{%GEO_TYPE%}: Geolocation source. 1 - GPS/Location services; 2 - IP address. -
{%PPI%}: Screen size as pixels per linear inch. -
{%PXRATIO%}: The ratio of physical pixels to device independent pixels (float).
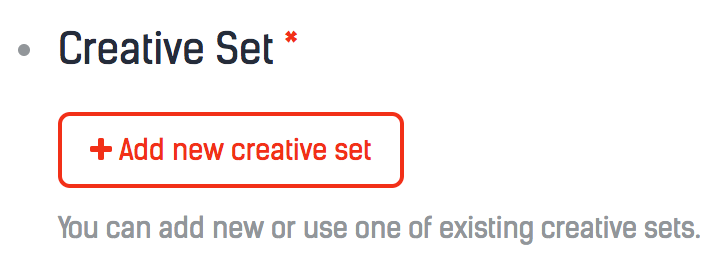
2.10. Creative Set: adding to and removing from Campaign Form
HTML and Vast tag macros
When creating a new campaign, click on "Add new creative set" button:
After that, you can upload a new creative set by using HTML or an existing set.
When a creative set is successfully added to a campaign you will see some useful information:

- CTR - is the Click-Through Rate of this creative set from the previous day (the number of clicks divided by the number of impressions).
- IR - is the Install Rate of this creative set from the previous day (the number of installations/conversions divided by the number of clicks).
To see the Install Rate,check "Never show on a device after install" and input bundle ID of tracking app into "Advertised app bundle ID" field (this works for SDK versions greater than 2.0.0):
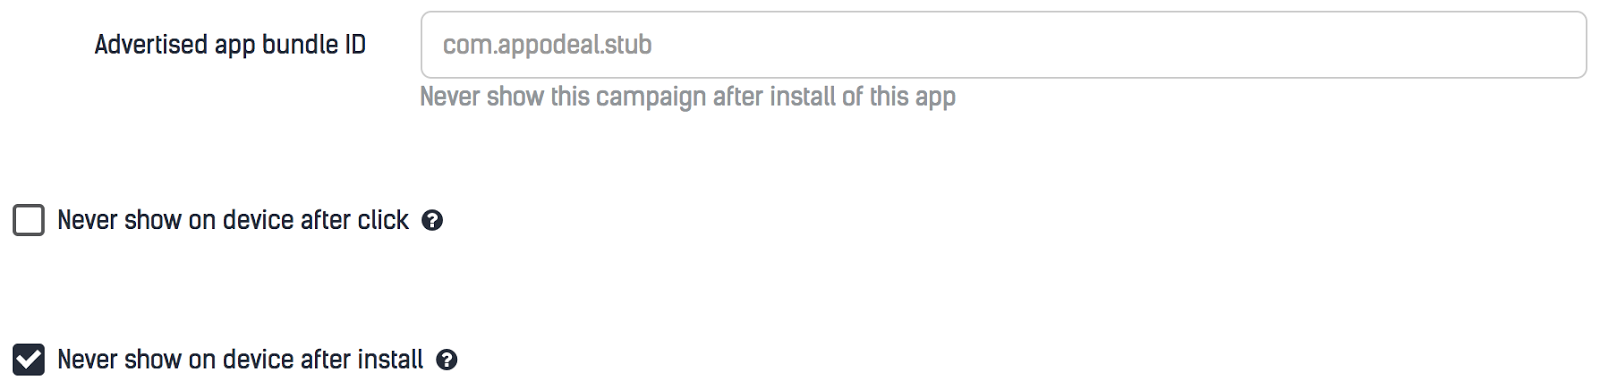
After this configuration, installation tracking will start working (both of your apps should have Appodeal’s SDK on the board).
3. Targeting Options
Targeting options consist of 4 types: GEO, Device & Platforms, and Connection & Locale.

3.1. GEO Options
We should mention that geo-targeting may not be 100% accurate because not all devices send the exact coordinates. If the app doesn't collect device coordinates, the GeoIP will be used for targeting instead. By default,your campaign is targeted to all countries:
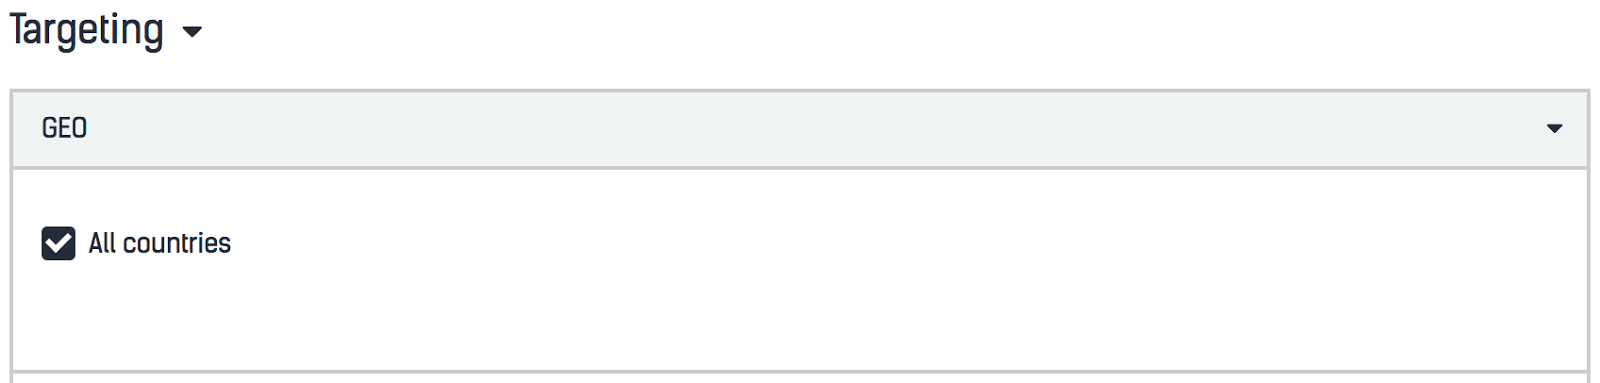
GEO block provides you 3 ways to target your campaigns by location:
- to an entire country;
- to a city;
- to a street address with particular latitude and longitude.
a. Country targeting
When you input the country’s name into "Include places" input (e.g. "USA") and click on the country from the dropdown list, you will see the country as a selected GEO location:

b. City targeting
When you input the name of a city into "Include places" input(e.g. "Saint-Petersburg") and click on the city from the dropdown list, you will see this city as a selected GEO location with the "City" label:
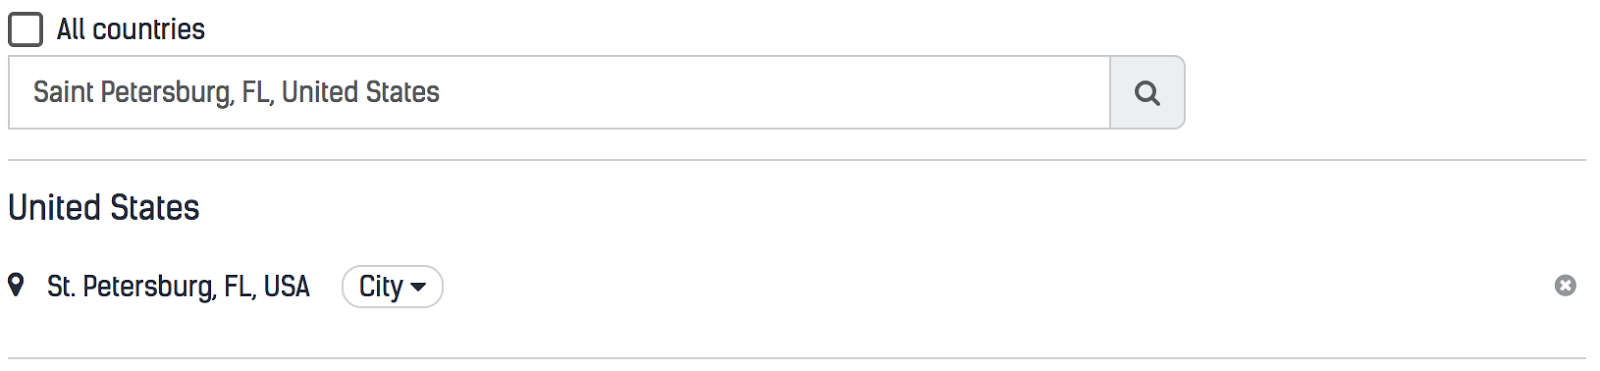
By clicking on the "City" label you can also change the targeting type from "City" to "Radius":
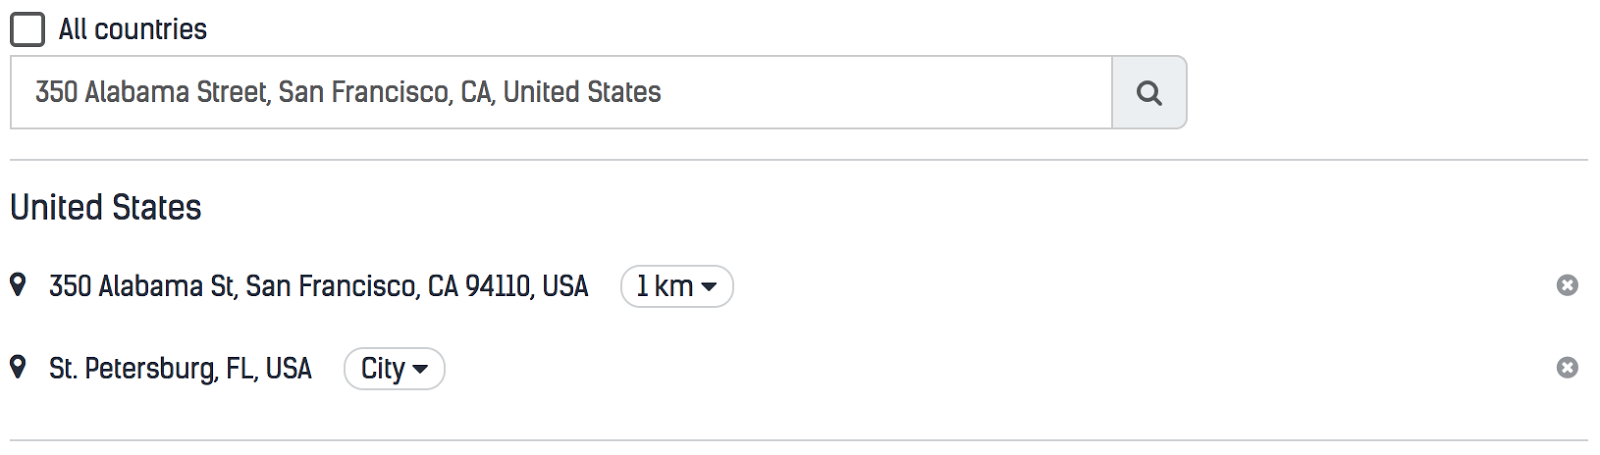
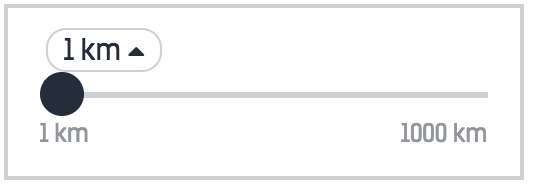
By default, selected street address or a certain point on the map has a radius of only 1 km. You can change it by clicking on the "1 km" label and choose another value:
3.2. Device and Platform
This block provides you these options:
- iOS version range;
- device type (Phone, Tablet or both);
- device model (iOS only);
- targeting by certain IDFA/Advertising IDs (You can target your campaign to a specific IDFA. If you add several items, separate them using commas. Maximum 1000 items).

3.3. Connection & Locale
This block provides you options to filter devices by their connection type (Wi-Fi, Mobile or both of them) and choose several mobile networks from our lists:
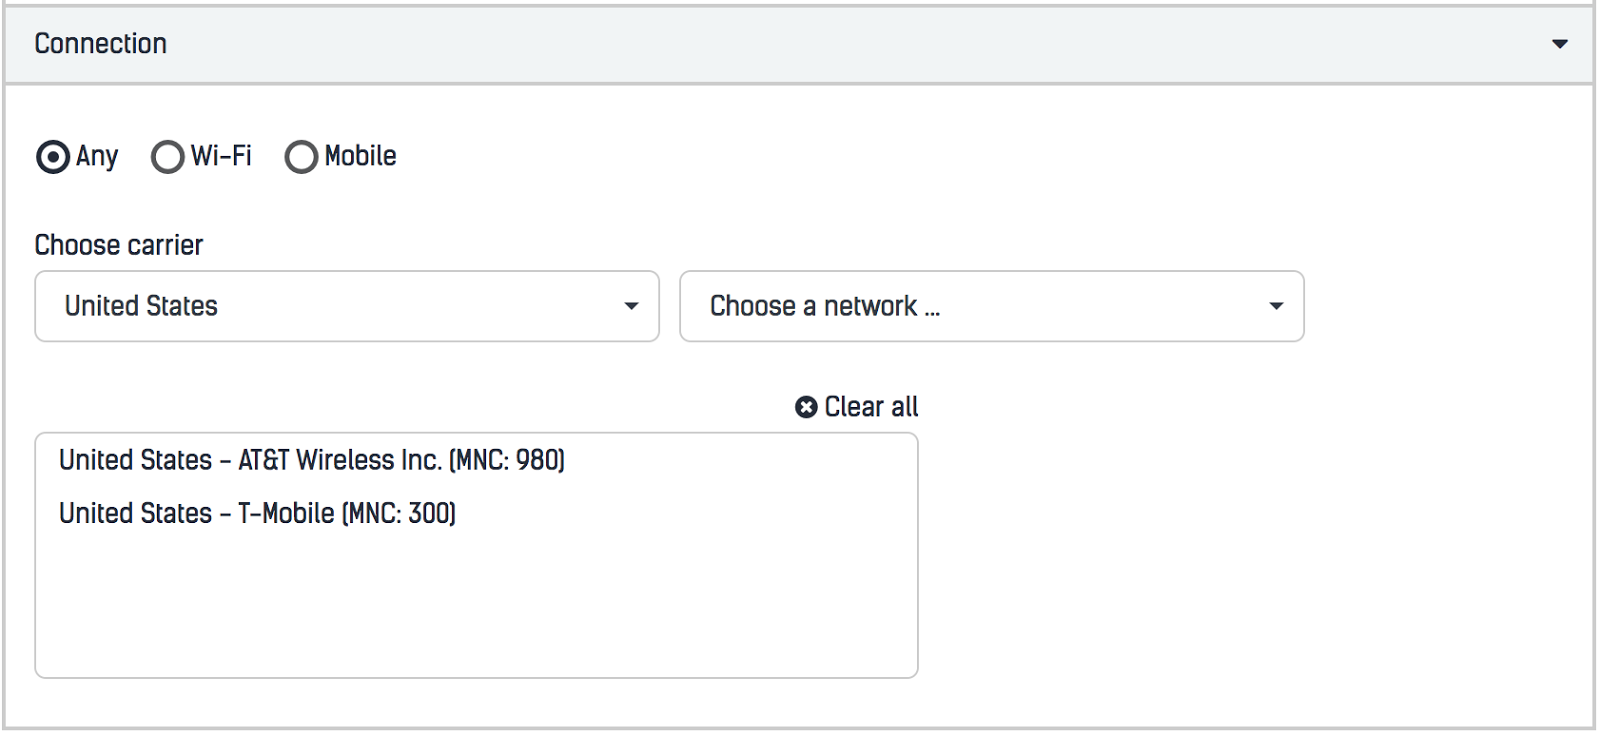
You can check the whole list of mobile networks and their MNN/MNC codes here**.
4. Advanced options and Frequency Capping
4.1. Frequency Capping Block
Frequency Capping provides you with a limitation of impressions amount for each unique device (By default there is no limitation):
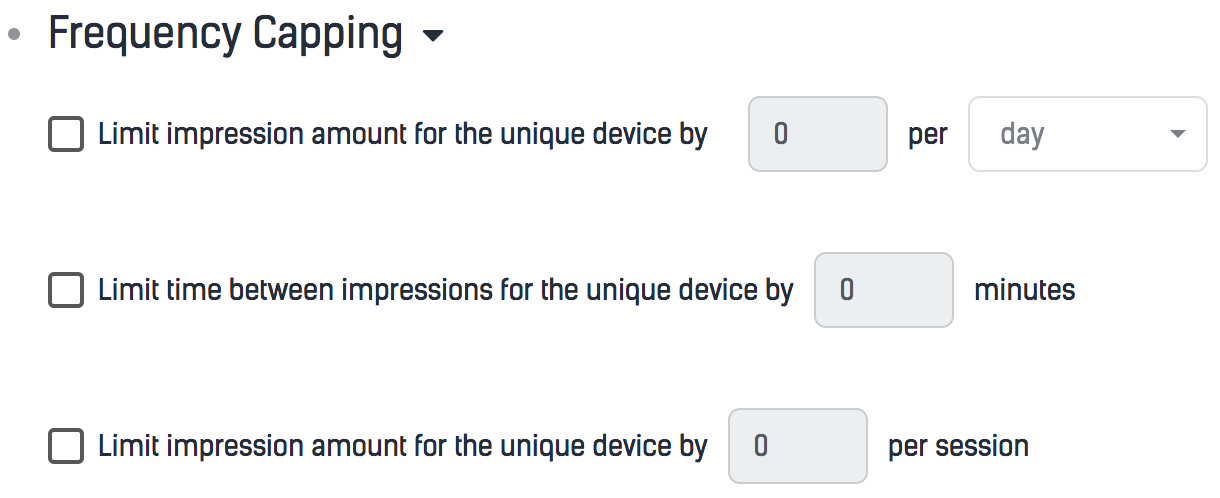
You are able to set:
- maximum impressions amount per day, per hour or per week;
- time between these impressions in minutes;
- impressions limitation per user session.
4.2. Advanced Options
Advanced options provide you with the ability to limit an entire campaign’s impressions:
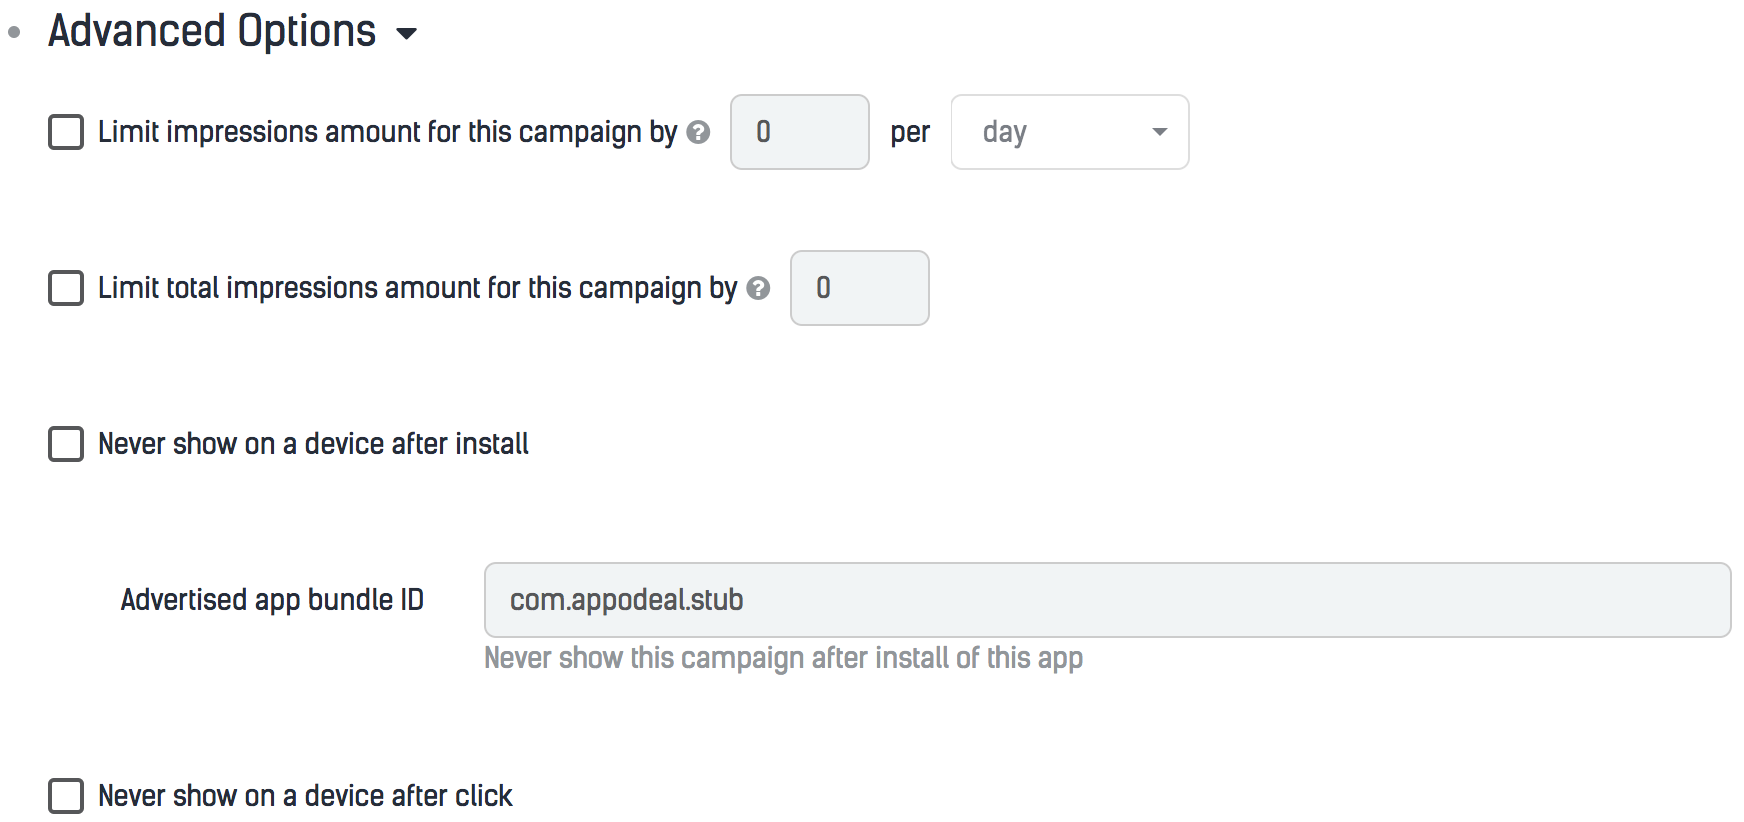
The main difference of the limitation from this block is that you limit the whole amount of impressions for a campaign and not for the unique device. You also can forbid campaign showing on a device after a click or install by selecting each checkbox. To make "Never show on a device after install" work you have to input bundle ID of the app you promote into the field "Advertised app bundle ID". After this configuration, installations tracking will start working (both of your apps should have Appodeal’s SDK integrated). Both of the "Never show ..." options work only from SDK versions 2.0.0.
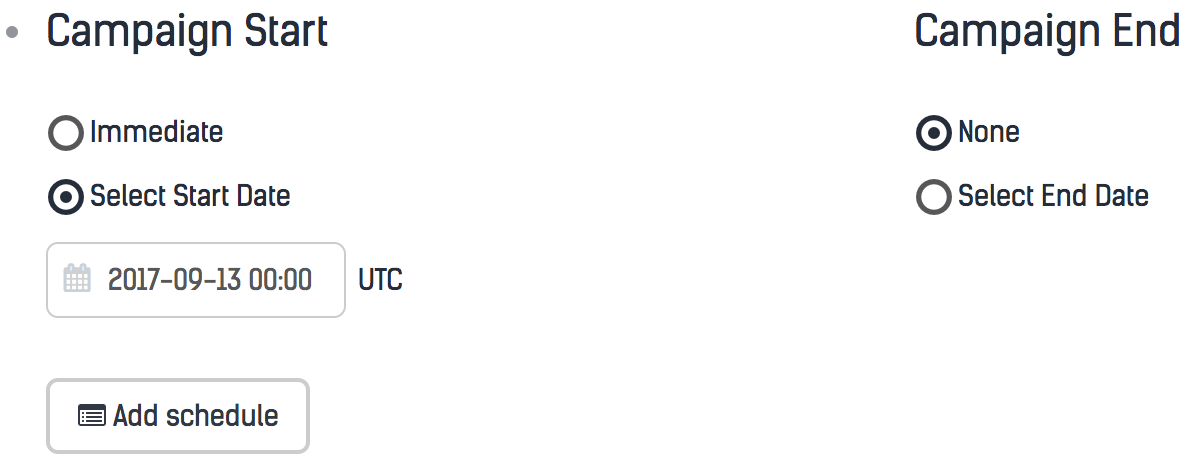
4.3. Campaign Start, End and Schedule
By default, the schedule is hidden and the campaign start/end are "Immediate" and "None". This means that after you turn on your campaign, it’ll start working immediately and it’ll only stop when you turn it off manually. If you want to change it, you can set start and stop dates:
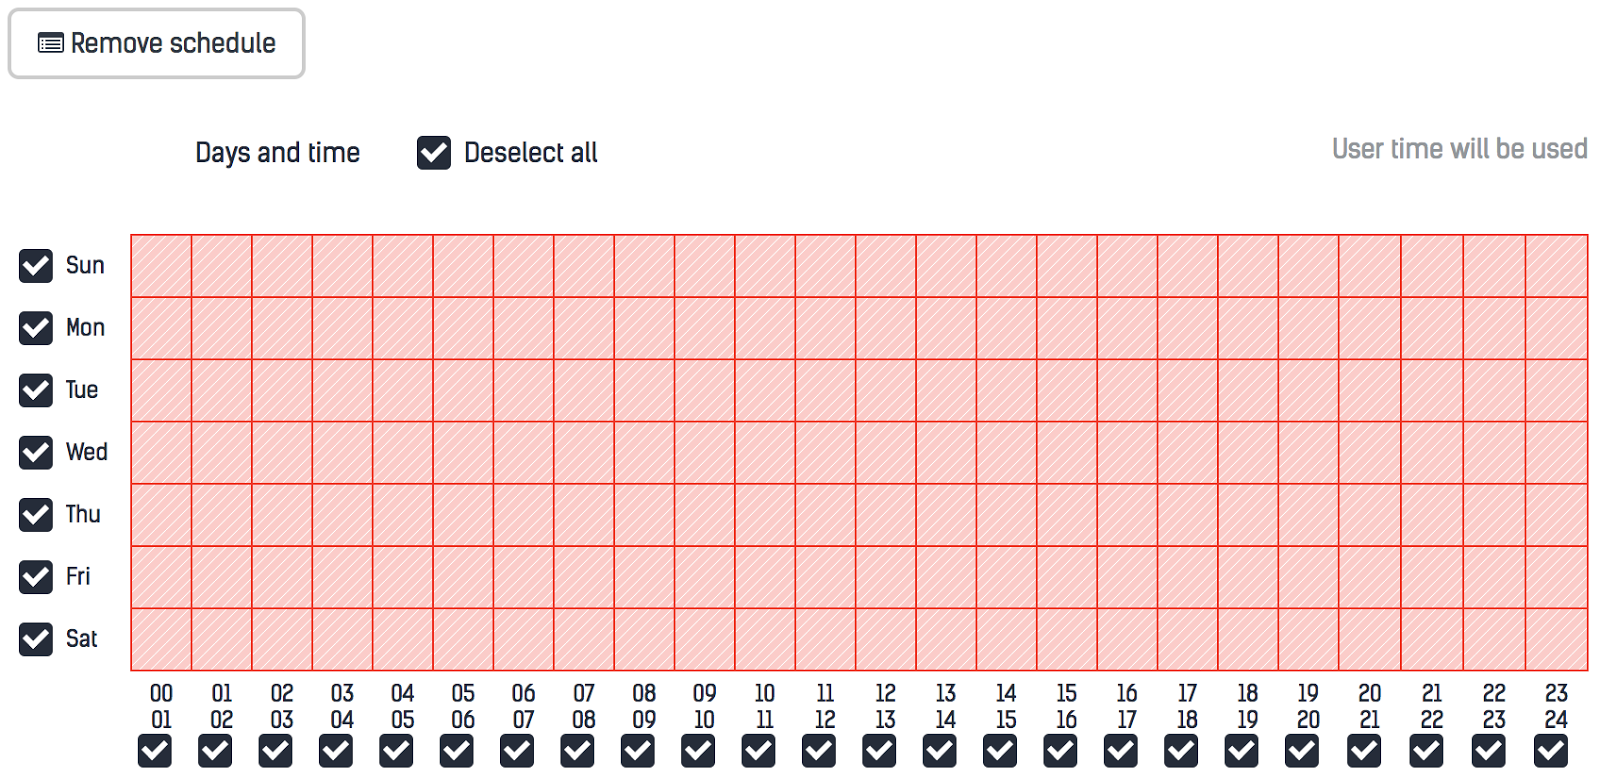
The schedule provides you with the option to make your campaign live only during selected hours and days of the week. Hour and day of the week are based on the user's device.
5. Campaign Prioritization
5.1. Prioritizing Your Campaign
In this block you can prioritize your campaign among other ad units and control its position by setting different eCPM values:
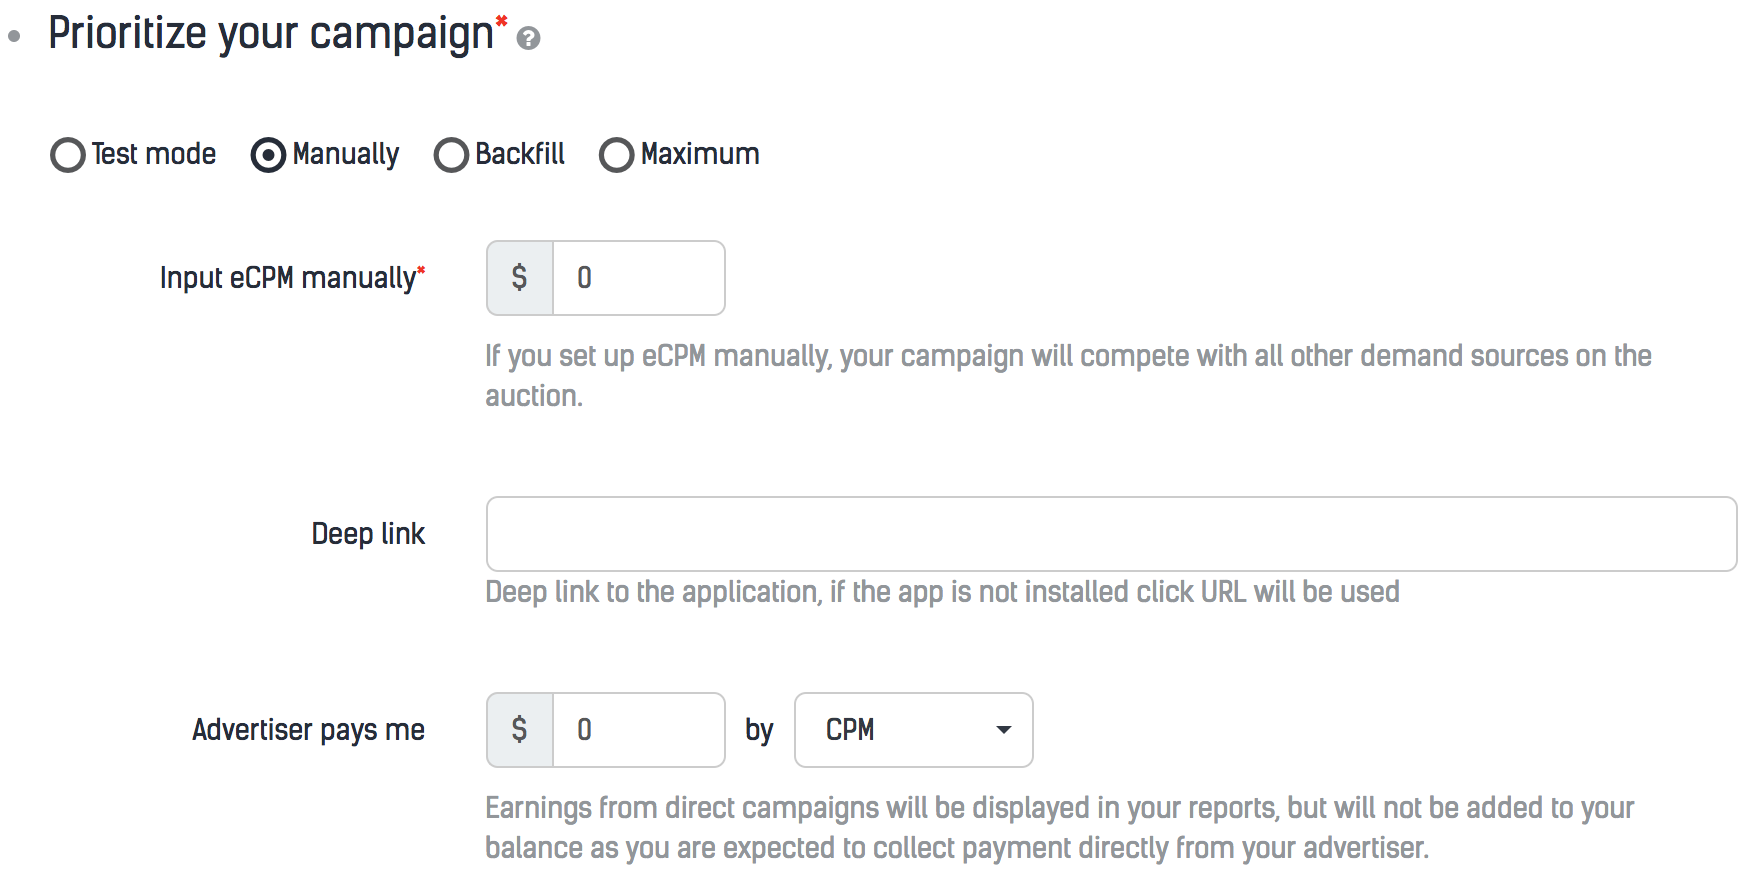
Params you could set here are:
- "Input eCPM manually" is the eCPM of your campaign. With this eCPM, your campaign will be entered into the waterfall (this option is required).
- "Click Url" param is the URL where a user will be redirected after clicking on your ads (this option is also required).
- "Deep Link" option means that you could set a link to open your app (where the deep link is configured) on a user's device or open a specific screen within the app. If the app is not installed, click URL will be used. For example, you can use "myapp://" to open your app after click on your ads or myapp://particular_location to launch directly into a particular location within an app.
- "Advertiser pays me" means that you could set your earnings from this campaign here, and they will be displayed in your reports, but will not be added to your balance.
When setting "Click URL", you can use one of the macros/tags that will be replaced with real values after your ads get clicked:
{image}"Creative ID" - ID of yours campaign creative.{device}"Device" - user's device model.{os_version}"OS Version" - user's device OS version.{device_id}"Advertising ID"/"IDFA" - Advertising ID/IDFA of user's device.{country}"Country" - country code (US, RU, etc.).{connection}"Connection" - connection type: "wifi" or "mobile".{width}"Width" - user's device screen width.{height}"Height" - user's device screen height.{click_id}"Click ID" - ID of the click on your ads into our database.{app}"App" - application Bundle ID.{type}"Ad Type" - ad type of you campaign with numeric value( Interstitial: 1, Video: 2, Banner: 3, Native: 4, MREC: 5, Rewarded Video: 6).
Also, you can choose "Backfill" or "Maximum" priority. With "Backfill" variant, the campaign's eCPM will be set to 0.001$ and campaign will be put at the end of the waterfall. So it means that this campaign will be shown only if all other ad units do can't be filled.
On the contrary, "Maximum" priority allows you to put your campaign on the top of the waterfall with 20.0$ eCPM.
The last option is "Test Mode". Campaigns in "Test Mode" are always shown on the top of the waterfall as they would have "Maximum" priority. But they are seen only on one or several devices which adid/idfa are set in the "Test device IDs" fields.
As you will see, the eCPM value impacts the position of your campaign in the waterfall. Setting manual value allows you to control the amount of traffic going to your campaign. Generally, using "Maximum" variant is preferable. If you want to control the amount of your traffic with a top limit, you should use "Limit impressions amount for this campaign by" in the "Advanced Options" block.
6. Best practices and FAQ
6.1. Checking your ads before launch on a specific device
It is better to check the campaign and creative rendering before launching it to a whole audience. You can do it by campaign targeting to your campaign" and input your device's advertising ID/IDFA inside "Test device IDs" fields:
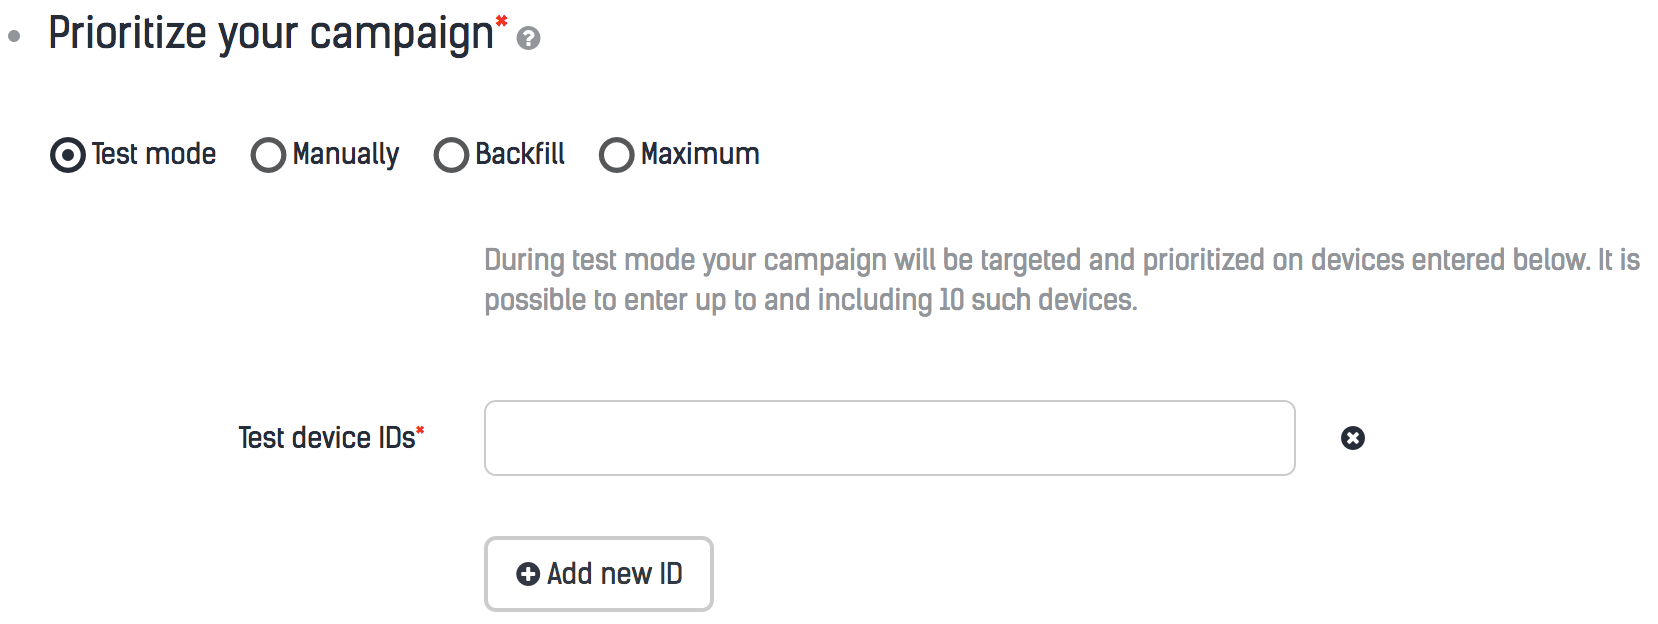
Then save the campaign and launch it. When you are sure that everything is ok, just change the prioritization mode to "Manually", "Backfill" or "Maximum" and save the campaign again.
6.2. Using HTML or JS tag as a creative for your campaign
If you want to use HTML code or a "JS Tag" in your campaign, you should check its rendering before launching the campaign. It should be possible to render your HTML code in a browser on your computer because, in general, it is just a simple webpage. In most cases, it loads the javascript file which then loads your ads through some callbacks.
As mentioned above, there is a way to check the creative on a specific device (see "Checking your ads before launch on a specific device"). What you should also do is to be sure that all of your URLs starts from its protocol (http://, https://, etc.) or you could set it with a "Base Url" field while creating a creative set. "Loading script" option in most cases is also required if real ads creative will be loaded only by JavaScript code after some requests to ads providers.
Typical HTML creative example might look like this:
All params are given only as an example, in real world they can vary. But usually some common things stay unchanged:
- Some javascript code being loaded by "<script ... />" tag stores all logic to finally show ads. So, all ads will be uploaded and shown only after this script makes its job. To make SDK wait for it you have to select "Loading script" checkbox.
- Because we still need the place to show your ads, you have to have a place to show into your HTML code (e.g. "<div id="ad_container">" tag)
- Settings needed for correct targeting and ads showing are usually
set into some javascript variables or global javascript objects like
"window/document" (e.g., "window.myAdsSettings =
{...}") - Because we use macros in this example for user's coordinates
determination ("
{%LATITUDE%}", "{%LONGITUDE%}") and device's IDFA ("{%IDFA%}"), you have to select "Use macros" checkbox. This ensures that your macros will be replaced on their values inside the waterfall. - The URLs in the example do not have any scheme at the beginning ("//one_more_external_script.js"). In most cases we use "http://" or "https://" for that. Due to that you have to select "Base URL" checkbox.
Ad Server also supports MRAID 2.0 creatives. More detailed information about this you can read here.
6.3. How many creatives should I upload into my Interstitial or Banner set?
To be sure that your campaign will be shown on all devices you have to upload at least one creative for portrait and one more for landscape orientation. Creatives with another size aren't required since for each device our algorithm chooses the closest creative by its dimension and ratio. Also, each creative would be fitted to the device's screen without any problems on iOS and Android.
6.4. What should I do if I want to launch several campaigns with one Ad Type?
Until we launch a better solution to rotate Ad Server campaigns with the same Ad Type (and in most cases with the same eCPM), we recommend these steps to launch several campaigns simultaneously:
Use frequency capping option "Limit impression amount for the unique device by" to make it possible to show each campaign on each unique device.
Set "Limit impressions amount for this campaign by ... day/hour" option. It will stop the campaign after reaching the limit and make it possible to move the traffic to your campaigns one by one.
Set different time to show each campaign by "Add schedule" option in "Campaign Start/End" block (e.g. one campaign could be shown on odd hours and another on even).
6.5. Do you support Vast Tags?
Yes, we support Vast Tag (or Vast Url). During adding video creative set you are able to choose between uploading video from your computer and just adding Vast tag.